
Solar Eclipse
Event Location: Cocoa-FL
Competition: Junior Solar Sprint
Division: 4-6 (JSS Green)
School: Orlando Science Schools
Team Size: 2
Names: Manasa S. Aliyah S.
Grade: 6th Collaborator: Mr. Nemcik
𝕄𝕒𝕥𝕖𝕣𝕚𝕒𝕝𝕤
- Balsa wood
- Box cutter
- Motor
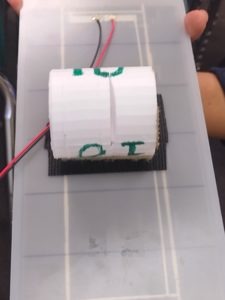
- 3D printed cylinder
- Hot glue
- Ruler
- Rubber bands
- Wooden stick
- Straw
- Velcro
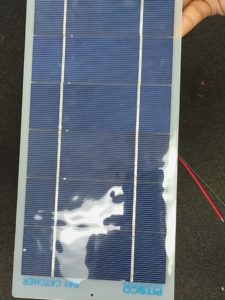
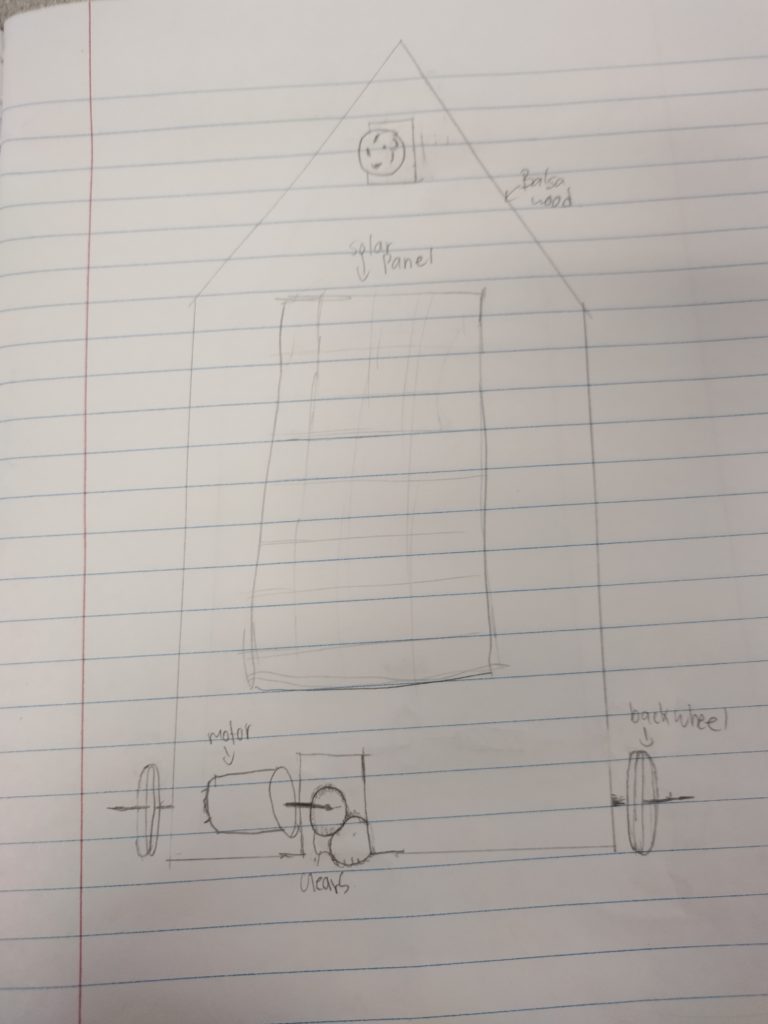
- Solar panel
- 1 30-tooth gear
- 2 60-tooth gears
𝕄𝕖𝕒𝕤𝕦𝕣𝕖𝕞𝕖𝕟𝕥𝕤, ℂ𝕣𝕚𝕥𝕖𝕣𝕚𝕒 𝕒𝕟𝕕 ℙ𝕚𝕔𝕥𝕦𝕣𝕖𝕤
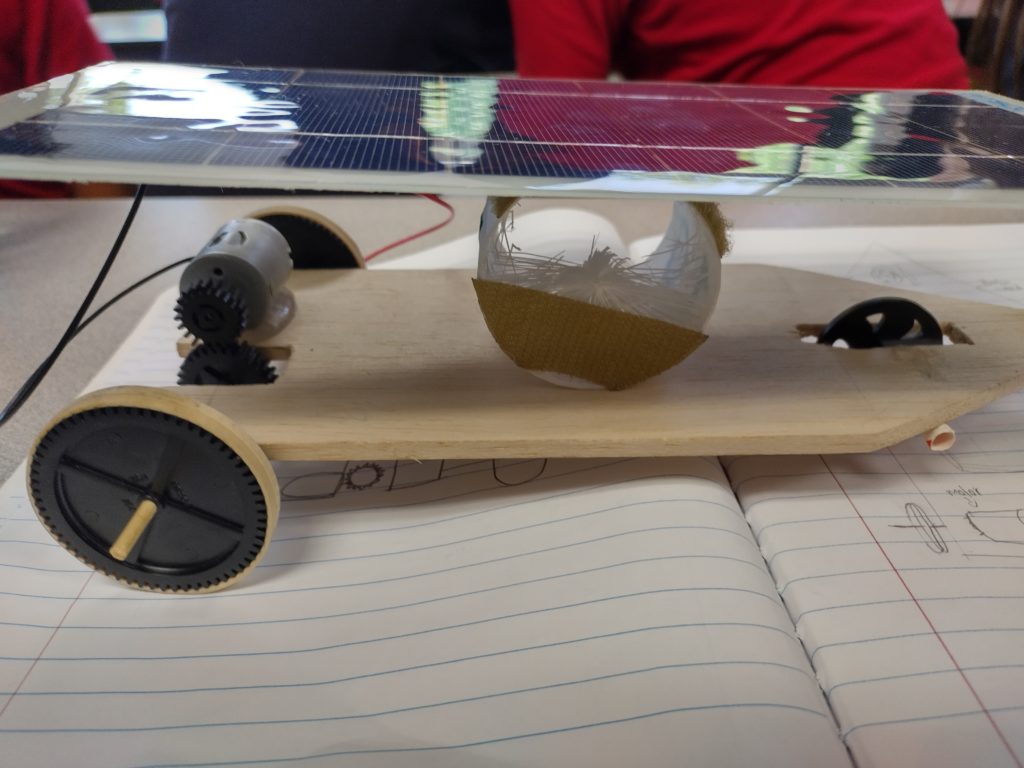
Measurements: 26.1 cm in length, 9.5 cm in width
Pictures
The Video
https://clipchamp.com/watch/9uuYxVQOWoq
https://clipchamp.com/watch/OQKUodSwYH7
https://clipchamp.com/watch/XNAOCa2j5sJ
https://clipchamp.com/watch/1cRC0KU9lTZ
𝕋𝕙𝕖 𝔼𝕟𝕘𝕚𝕟𝕖𝕖𝕣𝕚𝕟𝕘 𝔻𝕖𝕤𝕚𝕘𝕟 ℙ𝕣𝕠𝕔𝕖𝕤𝕤
Journal Check 1 – 1/17/23
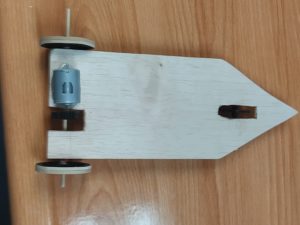
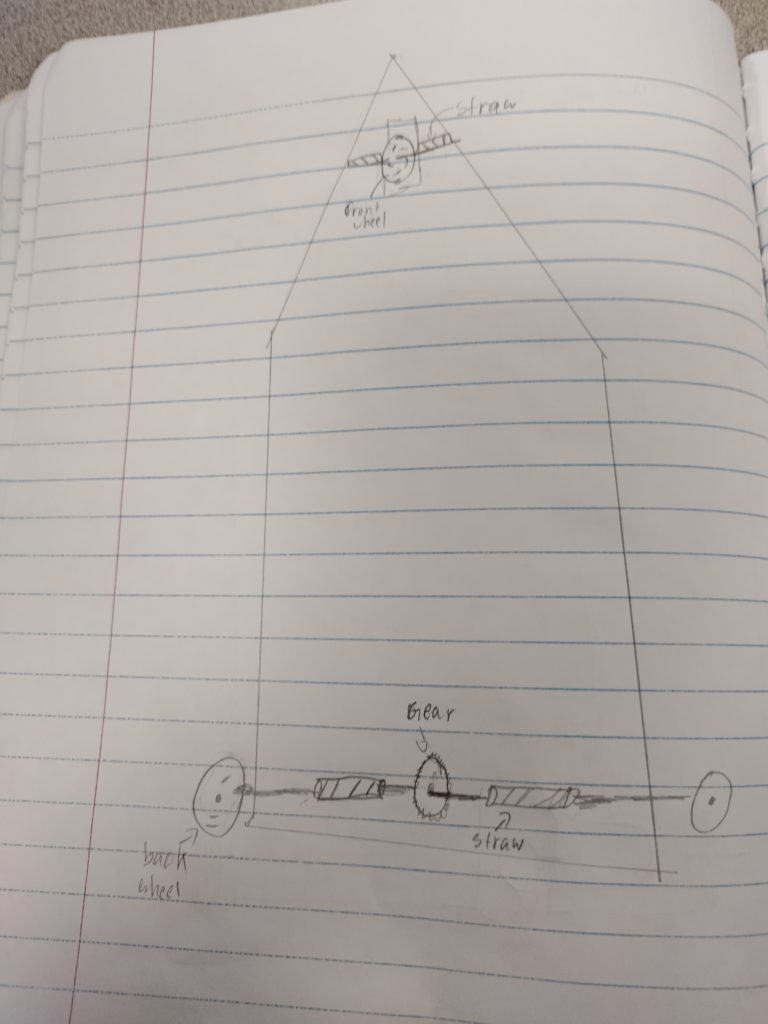
On the first day, we measured the point to the middle of the balsa wood, then we went 9 1/2 inches down, made a straight line, and made a straight line diagonally lines from the middle line we made on edge to the center point.
Journal Check 2 – 1/24/23
On the second day, we cut a spot for the motor and found a good gear combination. Which would be a 20-tooth and a 10-tooth gear. we used this because it would take up less space and have an equivalent amount of speed and force. We also cut out a border for where to put the motor.
Journal Check 3 – 1/30/23
We cut out a space for the gears and sanded it down. We hot-glued the motor to the balsa wood. Then we put the 10-tooth gear on the motor. After that, we tried putting rubber bands on different gears to make wheels.
Journal Check 4 – 2/7/23
We found the right kinds of gears to make the wheels then we found the right rubber band size to fit around the rubber band then we put 2 on each gear to make the back wheels.
Journal Check 5 – 2/14/23
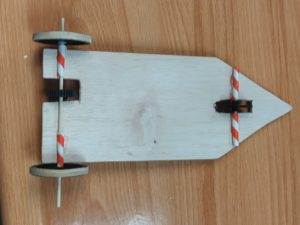
We reglued the motor and instead of a metal bar we are using a wooden skewer for the wheels, we also change one of the 60-tooth gears for a 60-tooth gear with a larger diameter so the wooden skewer could fit through it.
Journal Check 6 – 2/21/23
we put rubber bands on the front wheel. We also marked a rectangle in the front of the car to put the front wheel there
Journal Check 7 – 3/28/23
We cut the small rectangle that we made in the front. Then we replaced the wheel with a bigger diameter. We cut out small pieces of straws. We glued the cut-out straws next to the cut-out rectangle. Then we cut the rectangle to make it bigger.
Journal Check 8 – 3/7/23
we then put the wooden skewer through the front wheel and the straws and glued it on the car. first, we did it diagonally then we accidentally glued it on the opposite side so we finally did it correctly and put it on the correct side.
Journal Check 9 – 3/21/23
We put Velcro on the solar panel to attach it to the 3D-printed cylinder. We also worked on the website.
The wooden skewer is an excellent idea and I love the fact that you have it on Velcro and it’s adjustable based on where the sun is in the sky.