
Garden Goodies
Event Location: Cocoa-FL
Competition: Solar Energy Cook-Off
Division: 6-8
School: Orlando Gifted Academy
Team Name: Dennis' Menaces
Project Name: Garden Goodies
Team Size: 3
Ananya S. (7th), Micah C. (8th), Molly G. (7th)
Our Team’s History With EnergyWhiz
We have completed in the EnergyWhiz competition last year, 2024. This is the only solar cooking event we have participated in. Our team name last year was The 4 Chocolatiers. We made brownies. Some interesting information about our school and team is that we have building experience because we were in different build events in the Science Olympiad competition. Another fact is that last year, we only had one dish but this year we are doing 3 savory dishes. A fun fact about our recipe is that we use fresh ingredients from Florida (which are seasonal) and homemade bread.
Our Video
https://www.youtube.com/watch?v=M9HdEP0tkAw
Design Drawings
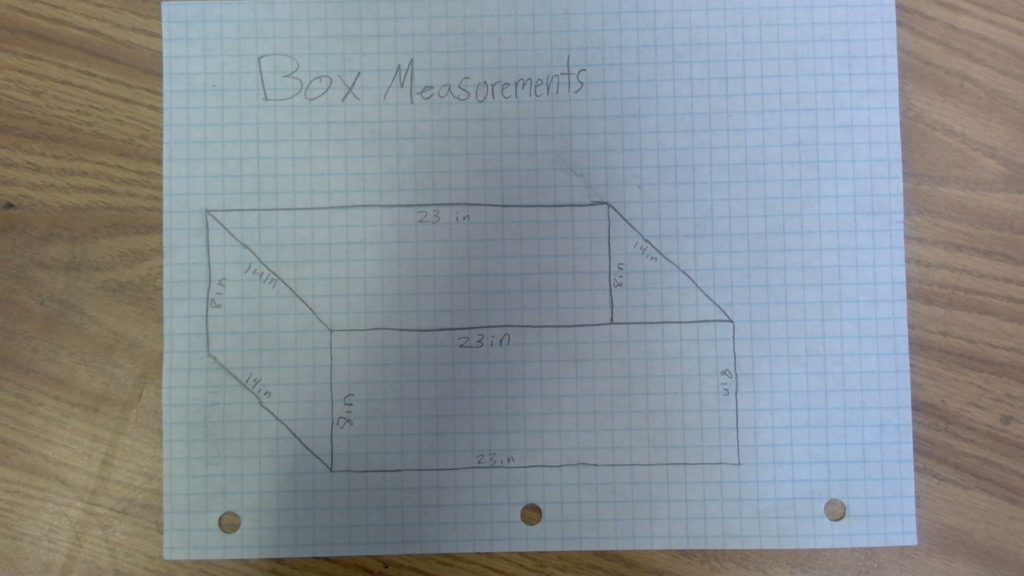

Measurements
Side Flaps: 7″x14″
Top Flap: 14″x23″
Main Box: 8″x14″x23″
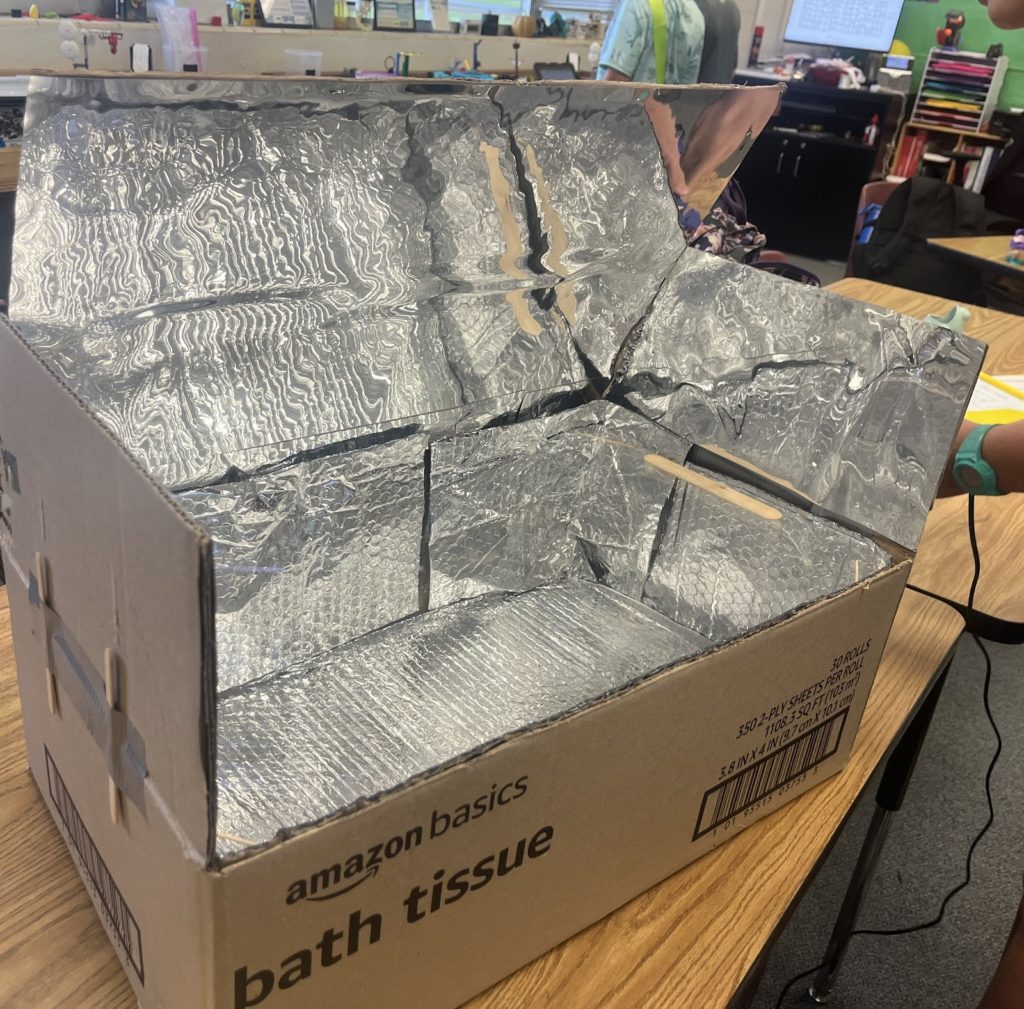
Our Solar Oven
We want our solar oven to reach 300 F. We need to contain heat and make a build in the time given. We decided to use a cardboard box (it is in a horizontal position). We used popsicle sticks and duct tape for the side flaps to stabilize and secure our structure. The top flap (our horizontal roof), is slanted. How did we keep it up? We decided to use hot glue and super glue to stabilize it. We kept it at a 70-degree angle. We put this reflective bubble insulation on the bottom of the oven and a bit on the walls. We used aluminum foil for the flaps, but they got wrinkled quickly. This would bend the light, causing the heat not to go directly to the food. That’s why we got reflexive mirror sheets. For our lid, we used plexiglass. We used popsicle sticks to keep the lid from falling into our food. We also used popsicle sticks as handles for our lid.
Why Did We Choose This Design?
We chose this design because it can cook a great amount of food, due to the amount of space we have. It can also contain a lot of heat because of our insulation. We can also cook food while the sun is at different angles because our top flap is adjustable. Our build can also capture a lot of light. We also know it works because it is based on a traditional solar oven.
Materials
Cardboard, reflexive mirror sheets, popsicle sticks, toothpicks, duct tape, reflective bubble insulation
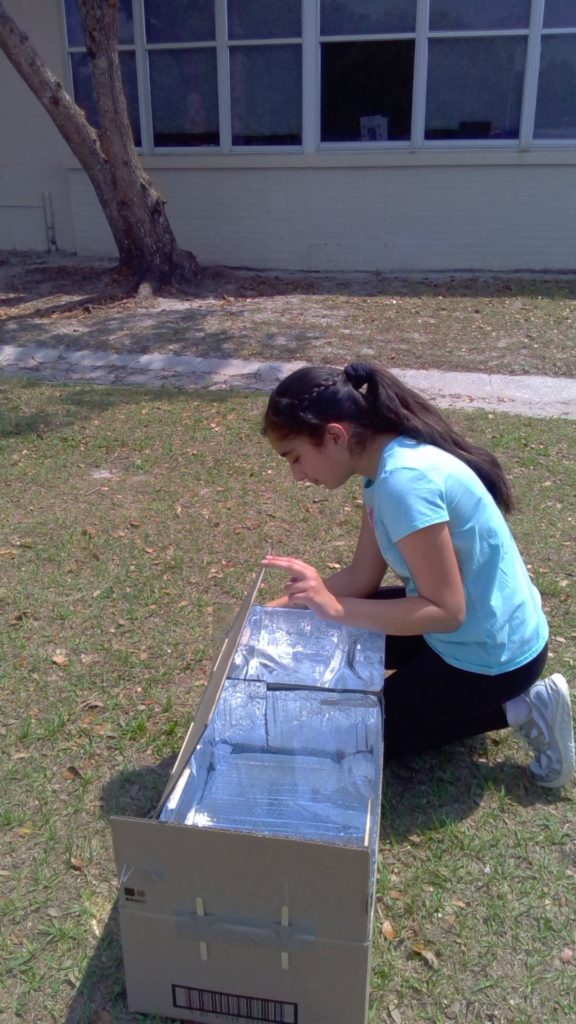
Test Results
2:30 PM, April 4th – 2:50 PM, April 4th = Ambient: 88 F, Inside of Oven:
8:30 AM, April 7th – 1:00 PM, April 7th –
8:30 AM: Ambient – 72 F, Inside of Oven – (Ambient)
9:40: Ambient – 75 F, Inside of Oven – 145
Possible Recipes
Brownies
INGREDIENTS
1 1/3 cups self-rising flour
1 cup sugar
1/3 cup unsweetened cocoa powder
1/2 cup vegetable oil
1/2 teaspoon vanilla extract
1/2 cup water
INSTRUCTIONS
Turn the oven on to 350 degrees and sift your flour into a mixing bowl.
Add your cocoa powder and sugar to the flour until mixed through.
Once they’re mixed, add in your wet ingredients.
Mix with a mixer until you have a smooth, thick batter (don’t over-mix; just go for no lumps)
Pour into a greased 8×8 pan. Bake for 30 minutes or until a toothpick comes out clean.
Whipped Cream
INGREDIENTS
1/2 cup strawberries
1 cup heavy cream
1/3 cup powdered sugar
1/4 teaspoon vanilla extract
Mash strawberries well with minimum chunks.
Tomato Soup
Ingredients
4 tablespoons unsalted butter
1/2 large onion, cut into large wedges
1 (28-ounce) can of tomatoes/2 pounds of seeded grape tomatoes
1 ½ cups water, low sodium vegetable stock, or chicken stock
1/2 teaspoon fine sea salt, or more to taste
Instructions
Melt the butter over medium heat in a Dutch oven or large saucepan (We are heating in our oven.)
Add onion wedges, water, tomatoes with their juices, and 1/2 teaspoon of salt.
Bring to a simmer. Cook for about 40 minutes. Stir occasionally and add additional salt as needed.
Blend the soup, and then season to taste. The soup doesn’t need to be ultra-smooth; some texture is nice. An immersion blender does make quick work of this, or you can use a blender. When using a regular blender, work in smaller batches, and don’t fill it too high – hot soup expands! For safety, remove the lid’s center insert and cover the opening with a kitchen towel while blending. This releases steam and prevents messy splatters.
Delectable S’mores Dip with Graham Cracker Chips
Ingredients
For the S’mores Dip:
• 1 cup semisweet chocolate chips (or finely chopped chocolate)
• 1 cup mini marshmallows
• 1–2 teaspoons heavy cream (optional, for extra creaminess)
• A pinch of salt
For the Graham Cracker Chips:
• 6 whole graham crackers (you can use gluten-free if desired)
• 1 tablespoon melted unsalted butter
• Optional: 1–2 teaspoons cinnamon sugar (for a sweet-spiced twist)
Instructions
• In a small, ovenproof dish (a shallow casserole or pie dish works well), evenly spread the chocolate chips.
• Drizzle the heavy cream (if using) over the chocolate. This helps create a silky texture when melted.
• Scatter the mini marshmallows over the chocolate layer, making sure they cover the entire surface.
• Lightly sprinkle a pinch of salt over the top to enhance the chocolate’s flavor.
Place the dish in the oven and bake for 10–15 minutes. Keep a close eye on it; you want the chocolate to melt and the marshmallows to puff up and turn a light golden brown. Since your oven is set under 300°F, the slow melt should create a beautifully smooth dip.
• While the dip is baking, preheat another baking sheet in your oven (or wait until the dip is done and use the same oven if timing allows) set at 275°F.
• Lightly brush each graham cracker with melted butter. If you’re using cinnamon sugar, sprinkle a little on top of each cracker.
• Break each cracker into bite-sized pieces. Spread them out in a single layer on a parchment-lined baking sheet.
• Bake for about 8–10 minutes, checking frequently. The chips should become crisp and lightly toasted. They may not turn as dark as traditional chips due to the lower temperature, but they’ll be perfectly crisp for dipping.
Garlic Bread
Ingredients
- ½ cup / 113.5 g Softened butter
- 4 cloves / 4 cloves Garlic
- 2 tbsp / 29.57 g Chopped coriander
- ½ tsp / 2.46 g Black pepper
- 2 / 2 Mini baguettes
Instructions
- Using a ricer mince the garlic cloves into the softened butter.
- Finely chop 2 tbsp of coriander and add it to the butter as well.
- Add black pepper to the mix and using a rubber spatula incorporate all these ingredients into the butter and make sure to mix them well.
- Your garlic butter is now ready.
- Slice the bread diagonally so you get bigger slices.
- Using a butter knife, generously apply the garlic butter on one side of each slice.
- Place them in a baking tray and bake the bread at 200ºC/ 400ºF for 8-10 minutes in a pre-heated oven.
- Alternatively, you can toast the bread in a frying pan as toast. For this, you have to apply the butter on both sides of the bread.
- Heat the pan on medium-low and toast the bread on each side for 1-2 minutes.
Chicken Sandwich and Toppings
Warm Chicken Sandwich with Melted Cheese and Garlic Mayo
Ingredients:
• 1 cup precooked chicken (shredded or sliced)
• 2 slices of homemade bread
• 2 slices cheese (Swiss, provolone, cheddar, etc.)
• 2 tbsp mayo
• 1 small garlic clove (minced or use garlic powder)
• 1 tsp olive oil or butter
• Salt & pepper to taste
• Lettuce or spinach (optional)
• Tomato slices (optional)
Instructions:
1. Make the Garlic Mayo
Mix in a small bowl:
• 2 tbsp mayo
• Minced garlic or a pinch of garlic powder
• Add salt & pepper to taste
Set aside.
2. Warm the Chicken
• Place chicken in a small skillet or baking dish.
• Add a splash of broth or water to keep it moist.
• Heat gently on low heat on the stove or in the oven at around 180–190°F until warmed through (about 10 minutes).
• Add cheese on top in the last minute or two, cover briefly to melt it.
3. Assemble the Sandwich
• Spread garlic mayo on both slices of bread.
• Layer warm cheesy chicken, tomato, and lettuce.
• Close it up and serve warm.
You might be biting off more than you can chew with all these recipes. The whipped cream also feels pretty out of place with nothing to go onto.
The whipped cream goes with the brownies. We have tested this recipe and we think it tastes delicous.
quite the menu, all you need is a sunny day
Large cooking area design to get everything done at once. Looking forward to seeing your oven on the 26th.