
Renegade Runners
Event Location: Cocoa-FL
Competition: Junior Solar Sprint
Division: 4-6 (JSS Green)
School: NSU University School
Team Name: Renegade Runners
Project Name: Renegade
Team Size: 3
Team Information
The Renegade
| Car Name: The Renegade |
| Team Name: NSU Renegade Runners |
| School Name: NSU University School |
| Team Members Names: Lorenzo R and Niko M |
Design Documentation
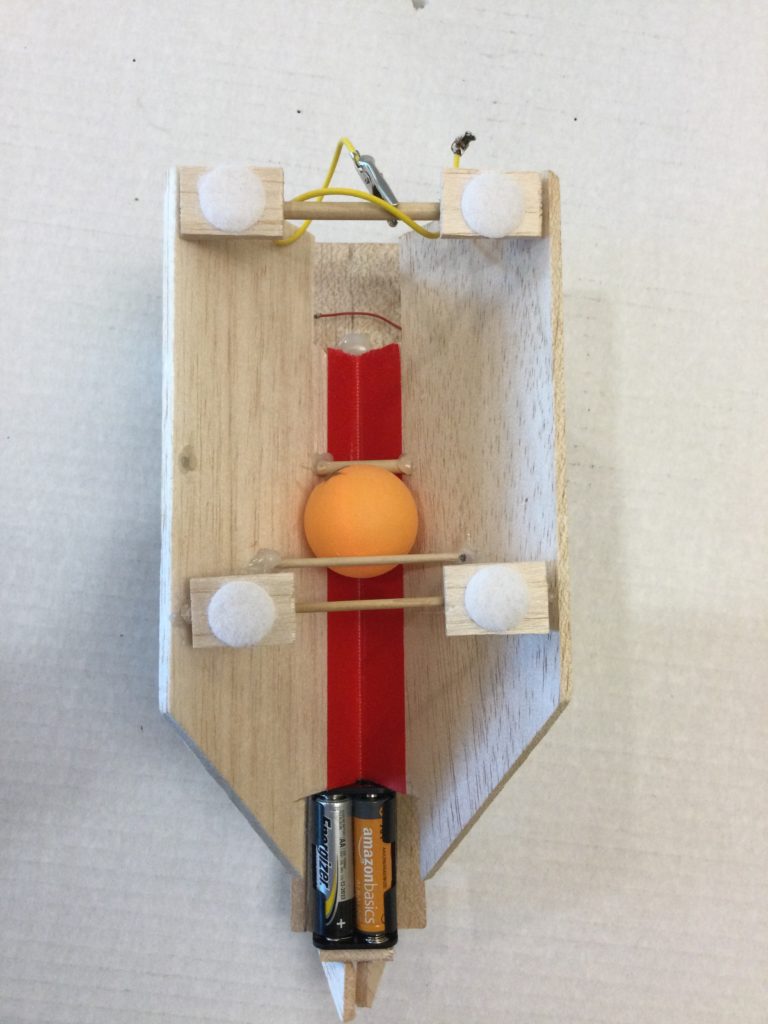
Top View without Solar Panel
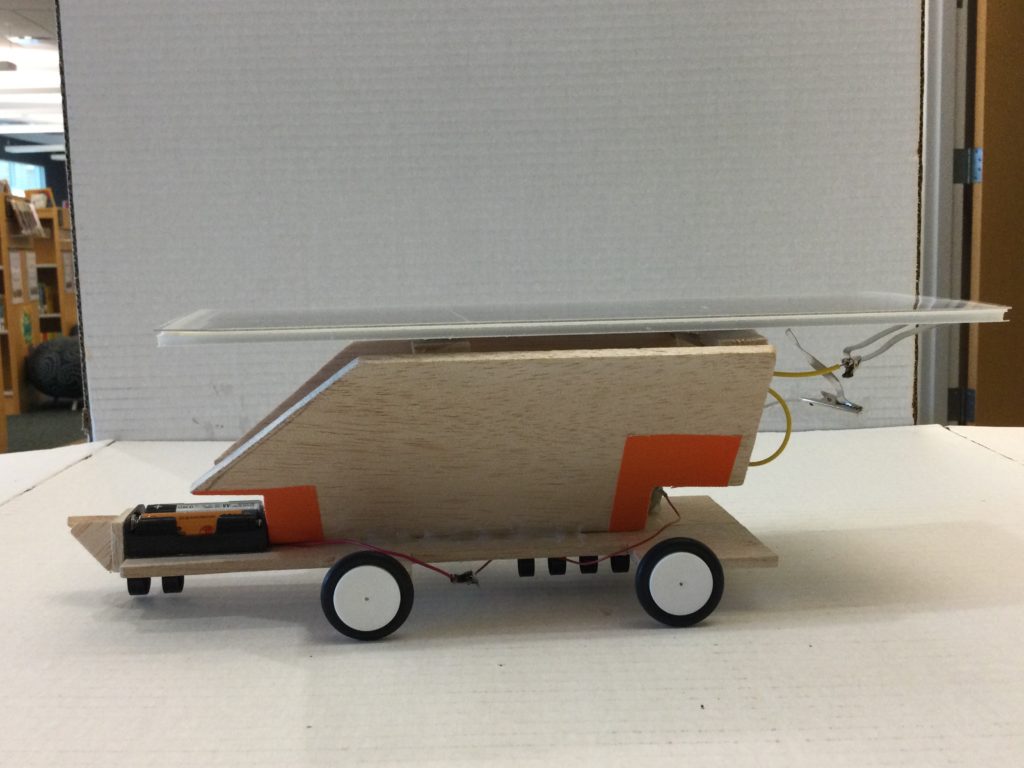
Side View #1
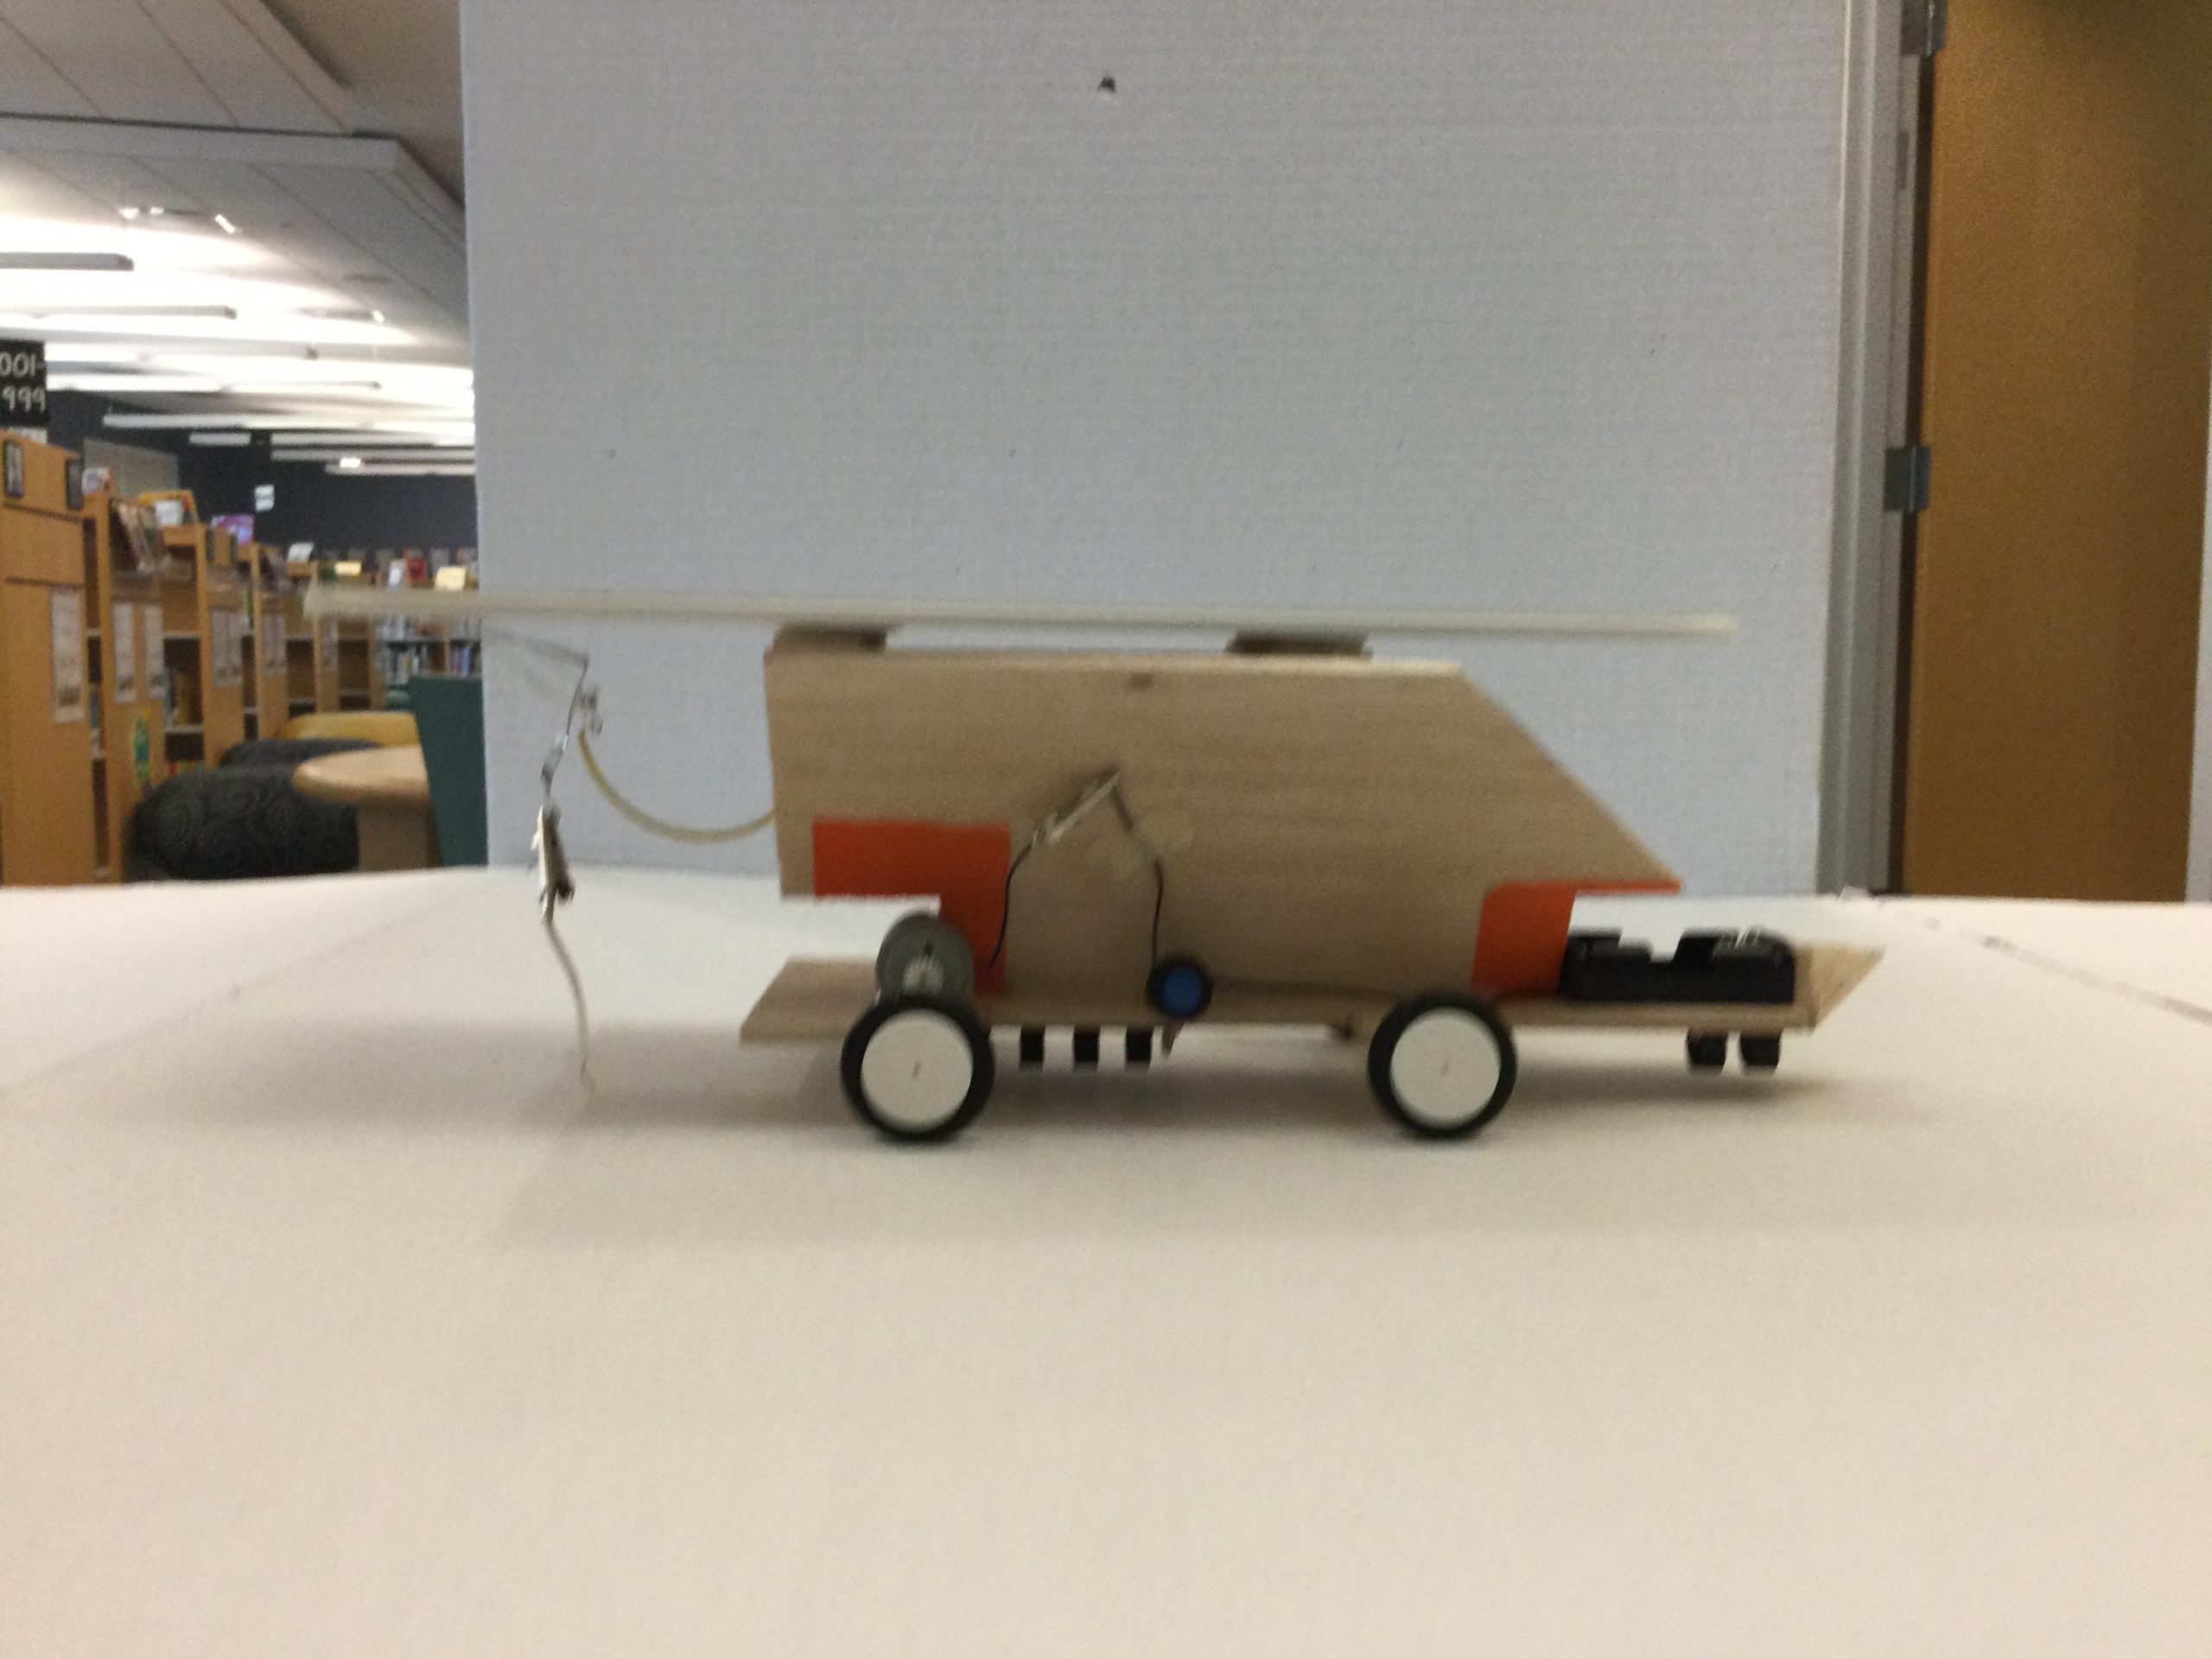
Side View #2
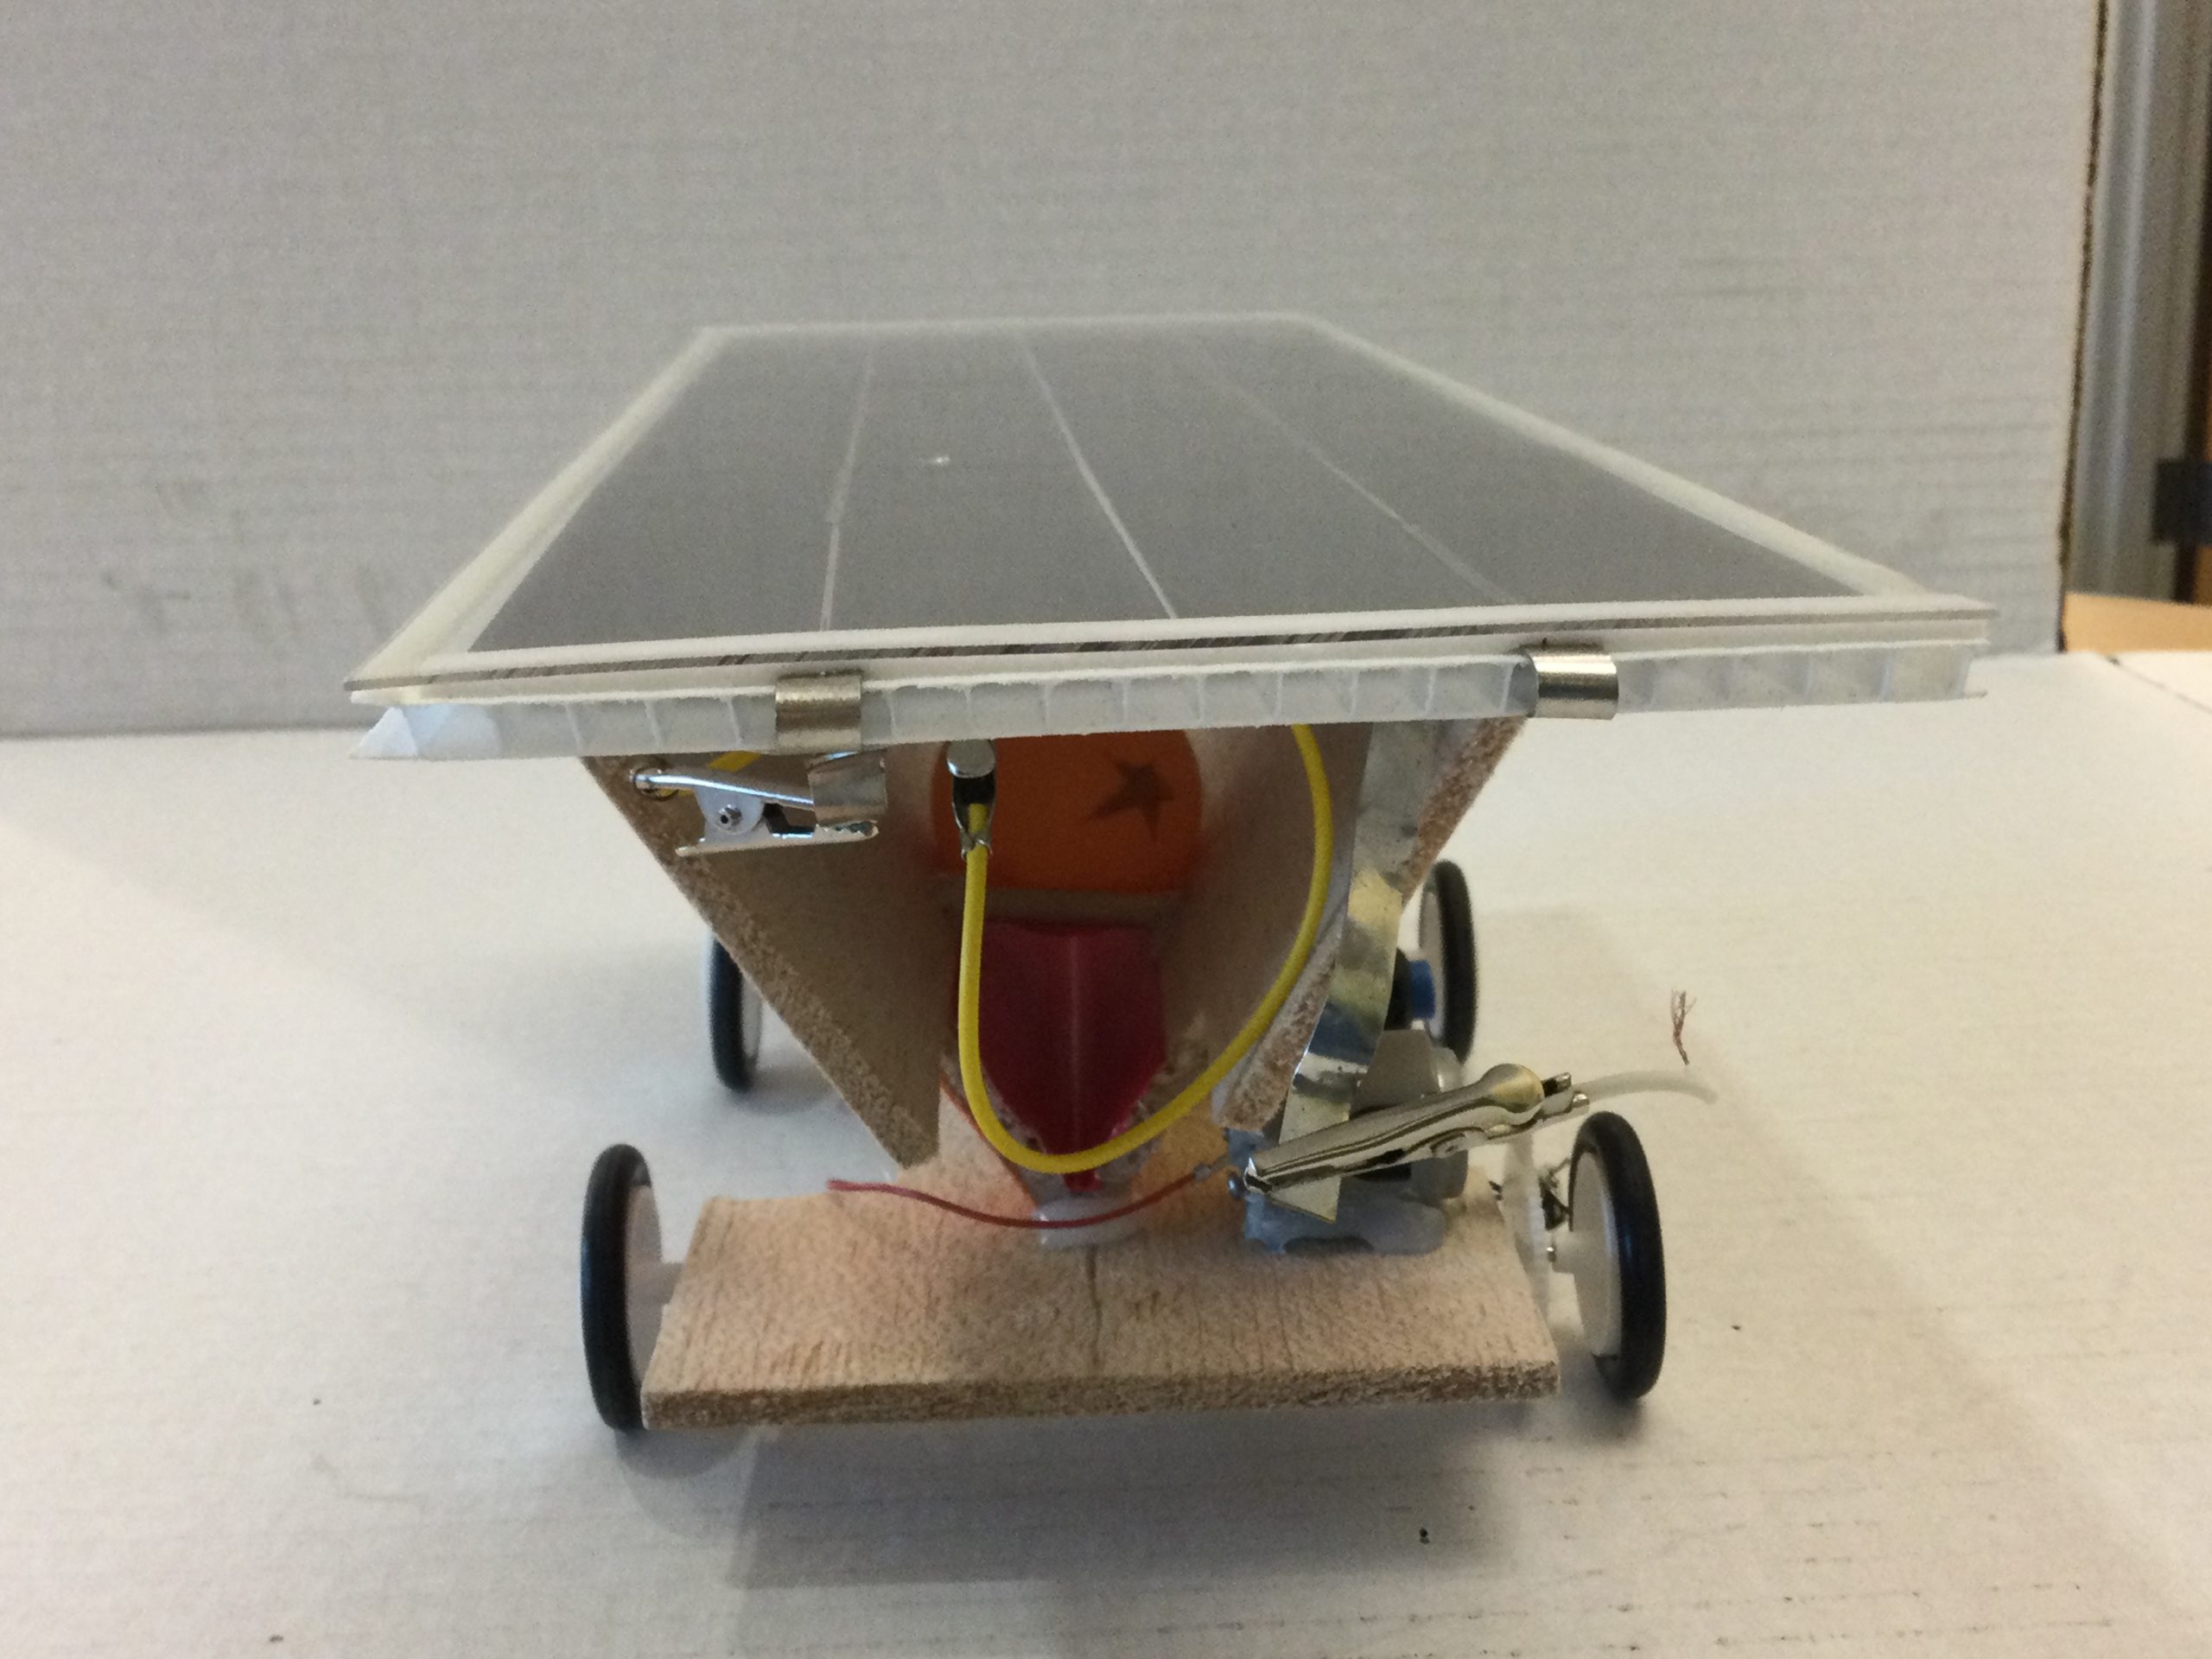
Back View

Front View
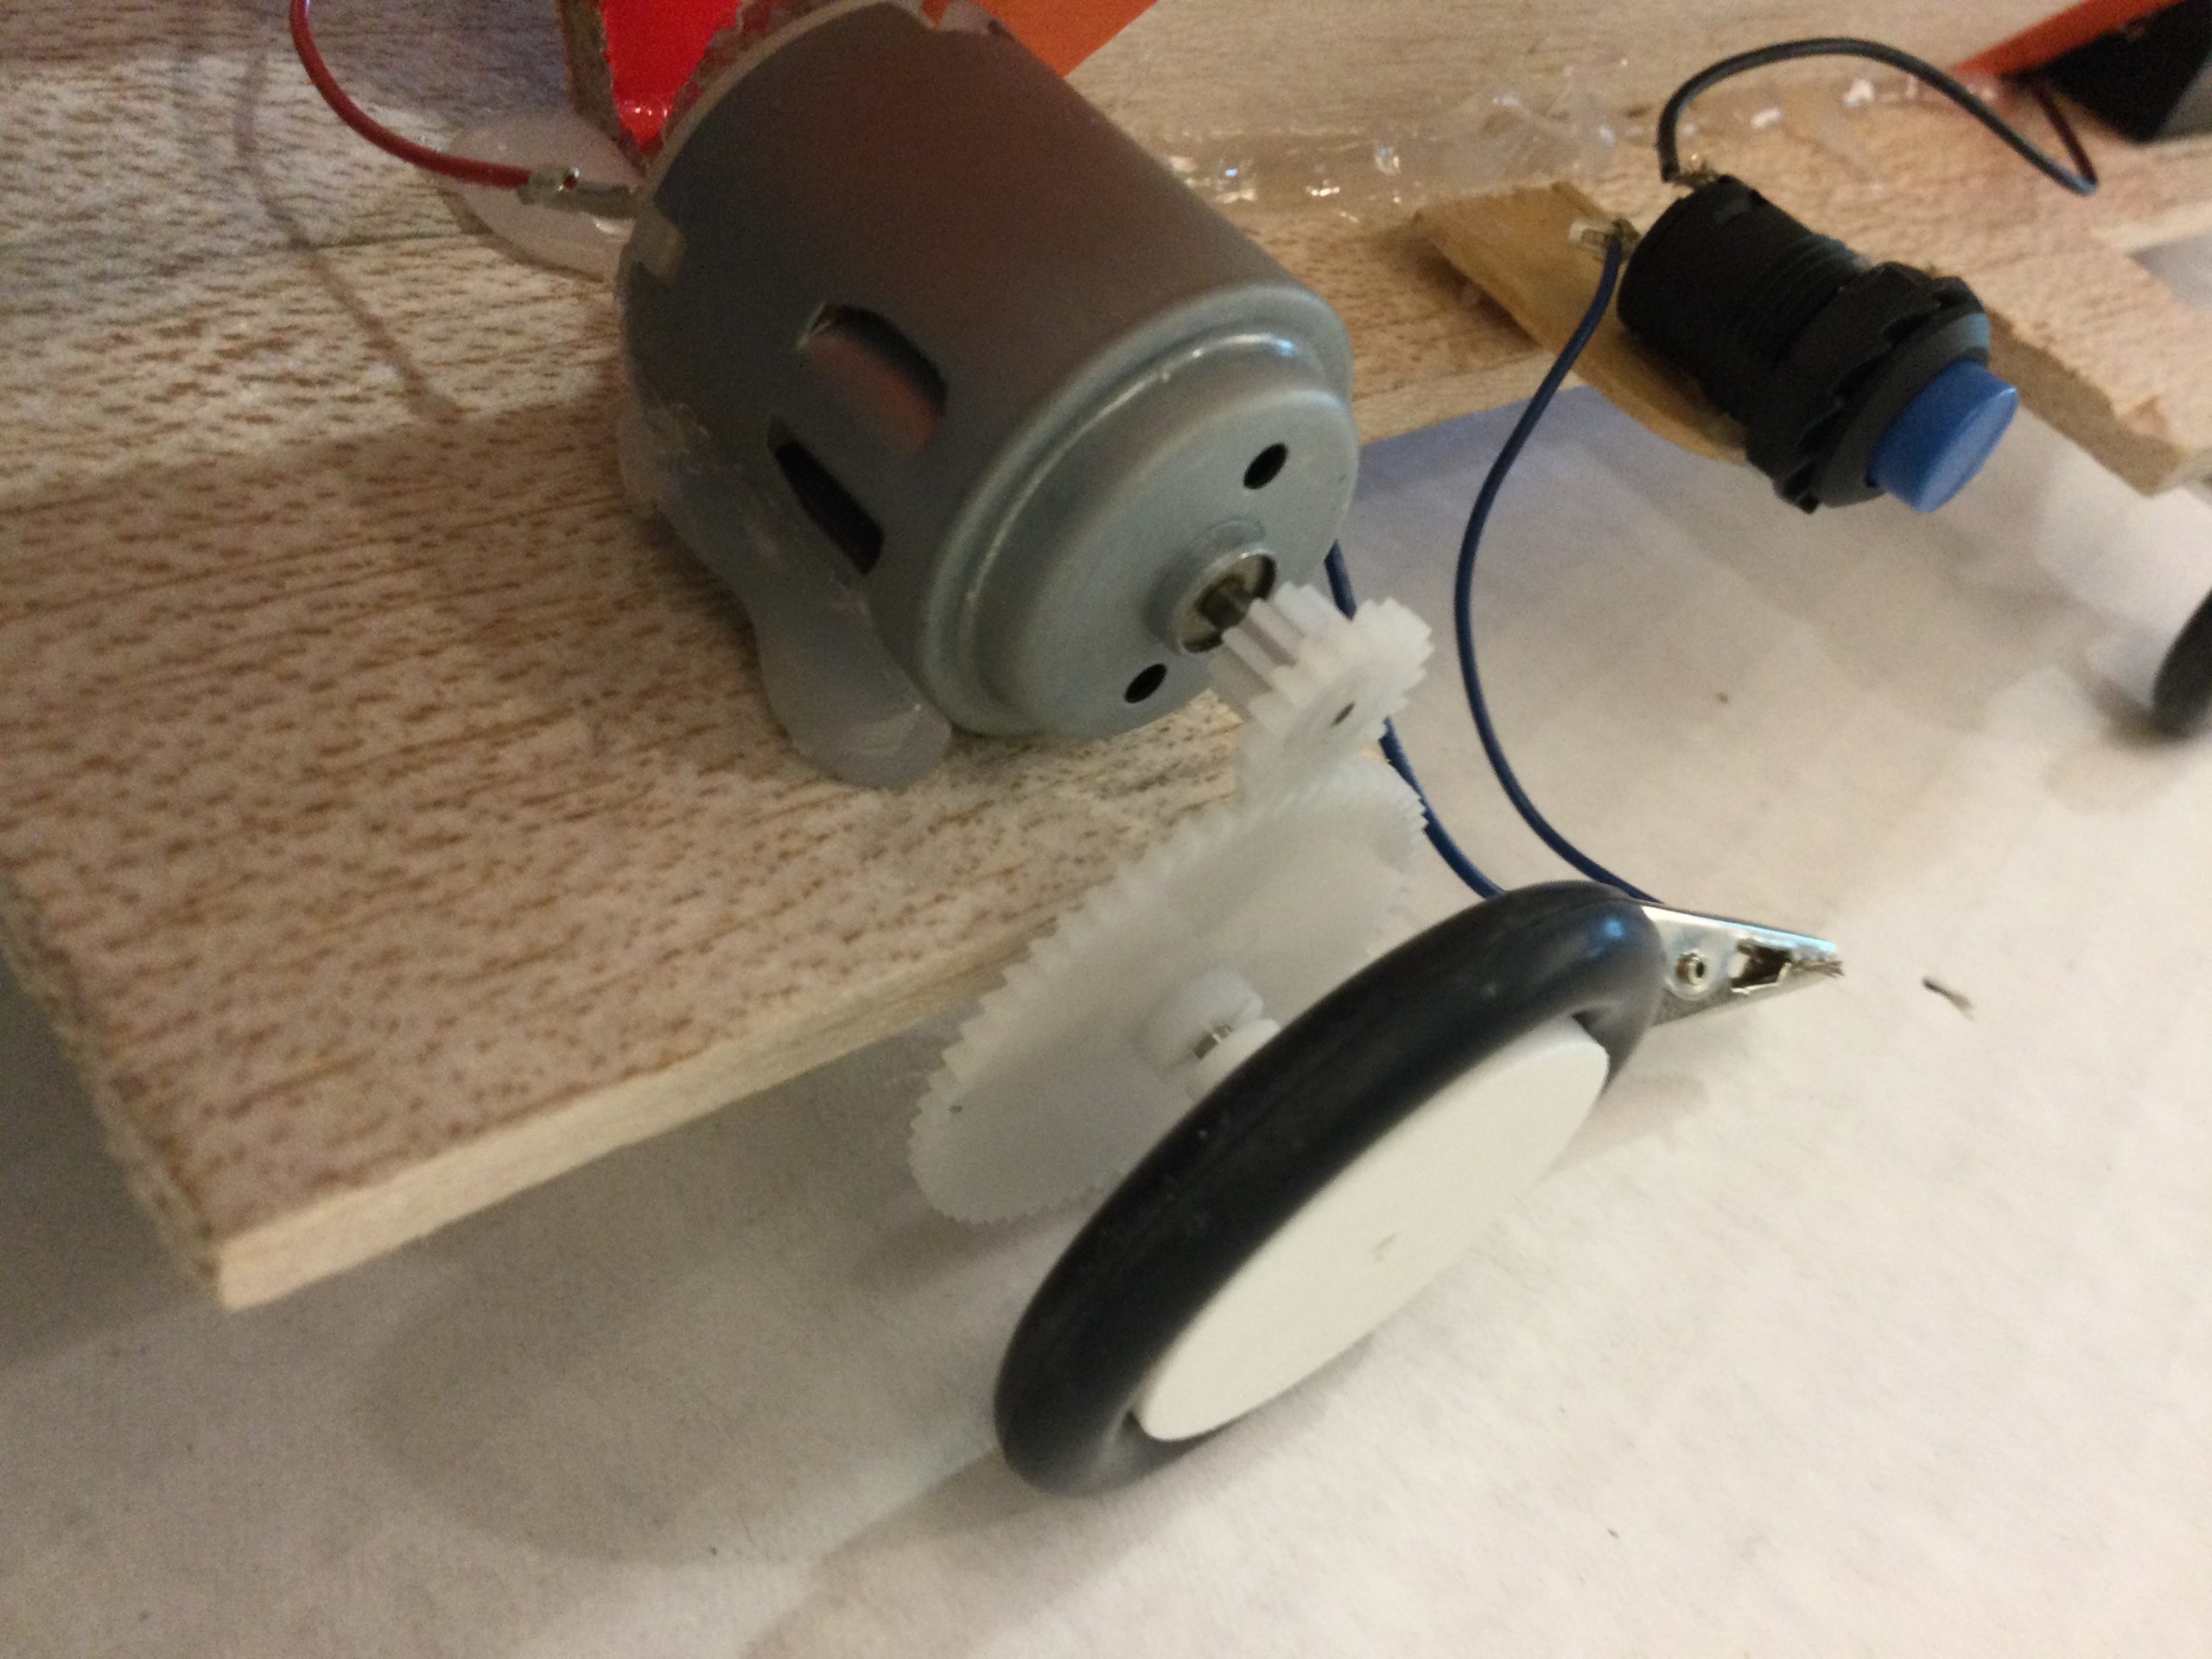
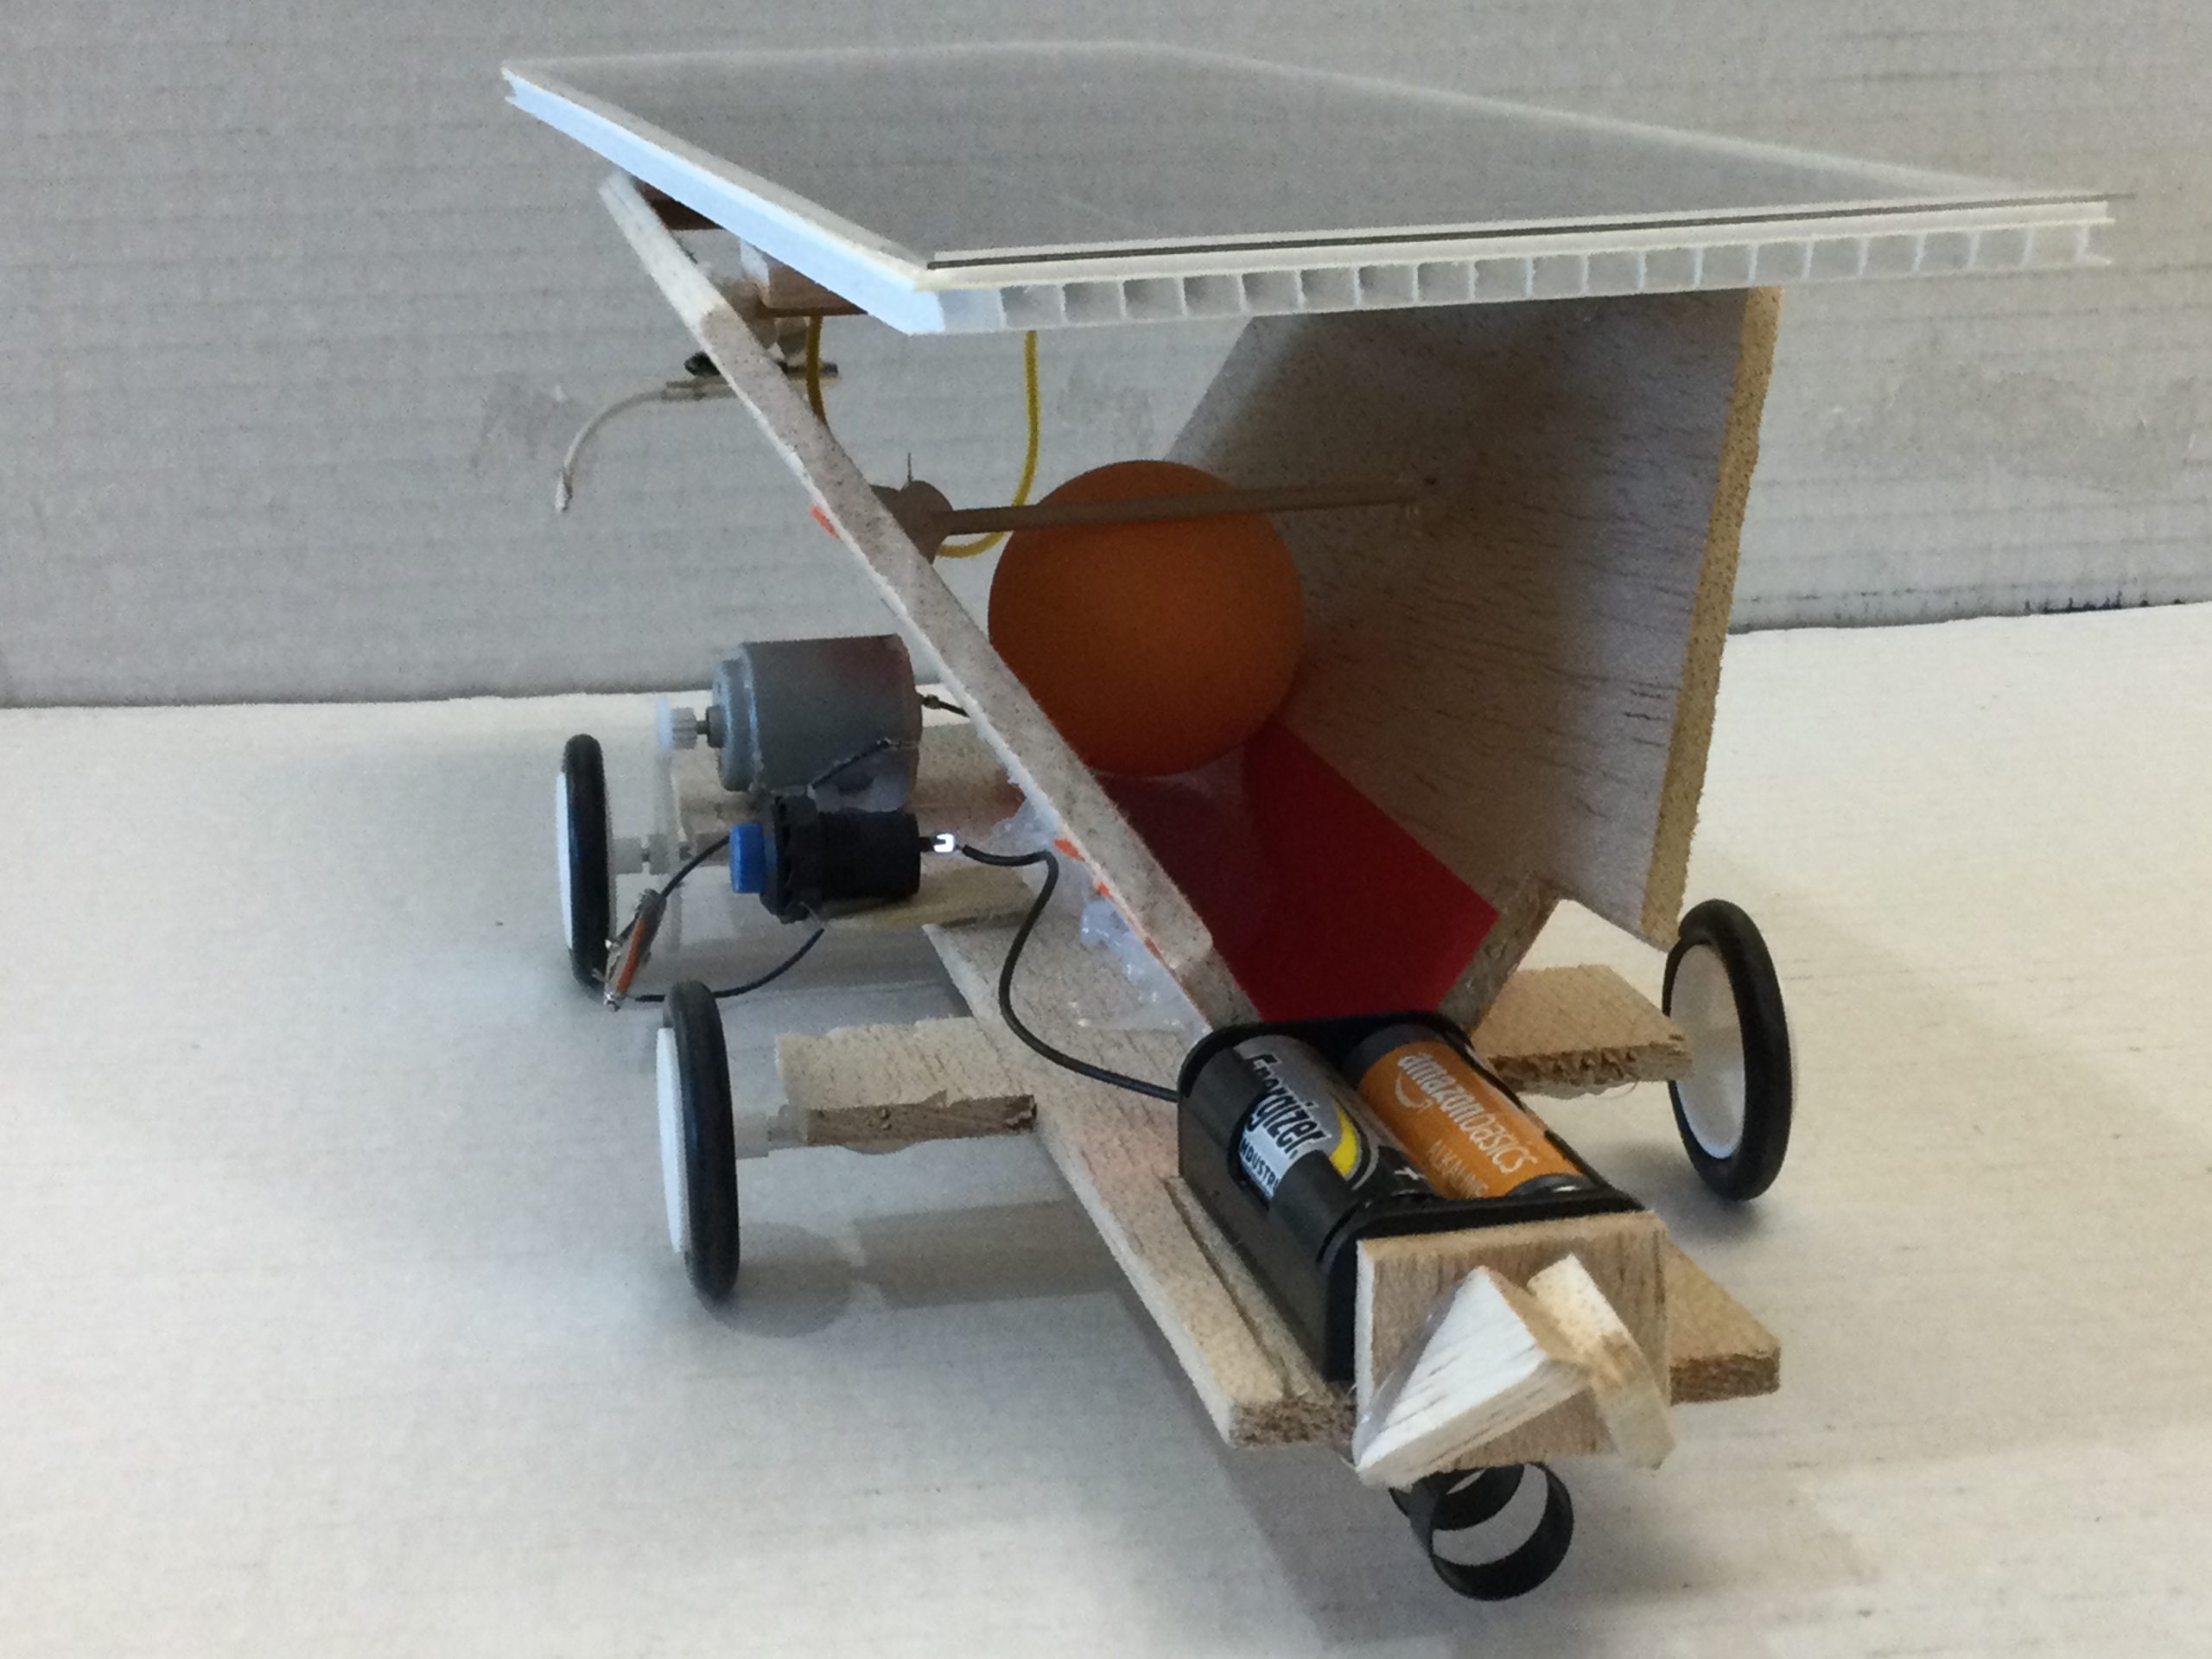
Close up of our motor and gears.
Project Log
| Date | Hours | Tasks / Work Done | Obstacles Encountered | Modifications to Car |
| 8/23 | 1hour | We drew our idea of what our car would look like. We started to gather materials. | Since it was our first time building a solar car, it wasn’t easy to come up with a building plan. | |
| 8/30 | 1hour | We worked on creating our body. | It took us a long time to cut the body. | |
| 9/6 | 1hour | We built supports to support our body’s sides. | It was hard to position the support bar. | |
| 9/13 | 1hour | We taped and glued our car. | The glue kept breaking apart. | We put the sides up for speed. |
| 9/20 | 1hour | The bars to hold the passenger kept falling off. | Putting the passenger in the car. | |
| 9/24 | 1hour | We cut the wood for the ball-holder and cut wood for more security. | It was hard to put our wheels and motor on. | |
| 10/1 | 1hour | We cut a hole to fit the motor. | Time went too fast. | |
| 10/8 | 1hour | We put on our back wheels. | We accidentally punctured the top right side of our car. | |
| 10/15 | 1hour | We attached the wires and alligator clips to our motor and battery pack. | It took us a long time to find good gears. | |
| 10/22 | 1hour | We finished our motor system. There is a motor, switch, and battery pack. We will have to place it so that there is not too much weight in one place and so that everything fits on our car body. | Time again went too fast. It is hard to get things done in a small amount of time. | |
| 10/29 | 1hour | We put on the switch and the motor. | The motor fell off when we were running the car. We will have to add it back on next time and figure out how to secure it better. | The switch and the motor were added to the car. |
| 11/6 | 1hour | We put the motor on (again!). | Our car went backwards! We had the wires on the wrong terminals. We decided to mark them so that it doesn’t happen again. | |
| 1/17 | 1hour | We put on the solar panel. The car looks awesome! | We had to replace the wheels. | |
| 1/24 | 1hour | We put on the guide so that we could run it on the guidewire. We decided to put it underneath the car. | We needed to make sure that we put the guide on straight and that it was not going to rub on the ground. | guide is on the car |
| 1/31 | 1hour | Worked on Web Page. | ||
| 2/28 | 1hour | Worked on Web Page. | ||
| 3/6 | 3hours | Worked on Web Page. | ||
| 3/9 | 1 hour | We ran our car outside | ||
| 3/11 | 1hour | We ran our car outside | ||
| 3/16 | 1 hour | We ran our car outside on battery and on solar panel | ||
| 3/17 | 3hours | Worked on Web Page. Put on The Wind Shield on the car. | added part 1 of the wind shield | |
| 3/20 | 1hour | Worked on Web Page. Put on the other part of The Wind Shield on the car. | added part 2 of the wind shield | |
| 3/21 | 30min | Worked on Web Page. | ||
| 3/22 | 1hour | Finished the Webpage. When we get back from our spring break we are going to try to make changes to the car so that it will run faster. | ||
| 4/3 | 1.5 | We added a 3cm x 3cm piece of wood to the car so that we can have our race number displayed. We also put velcro on our wires so that they would not interfere with the wheels or gears. | Velcro to hold wires. Pieces of wood to display race numbers. |
Design Drawings
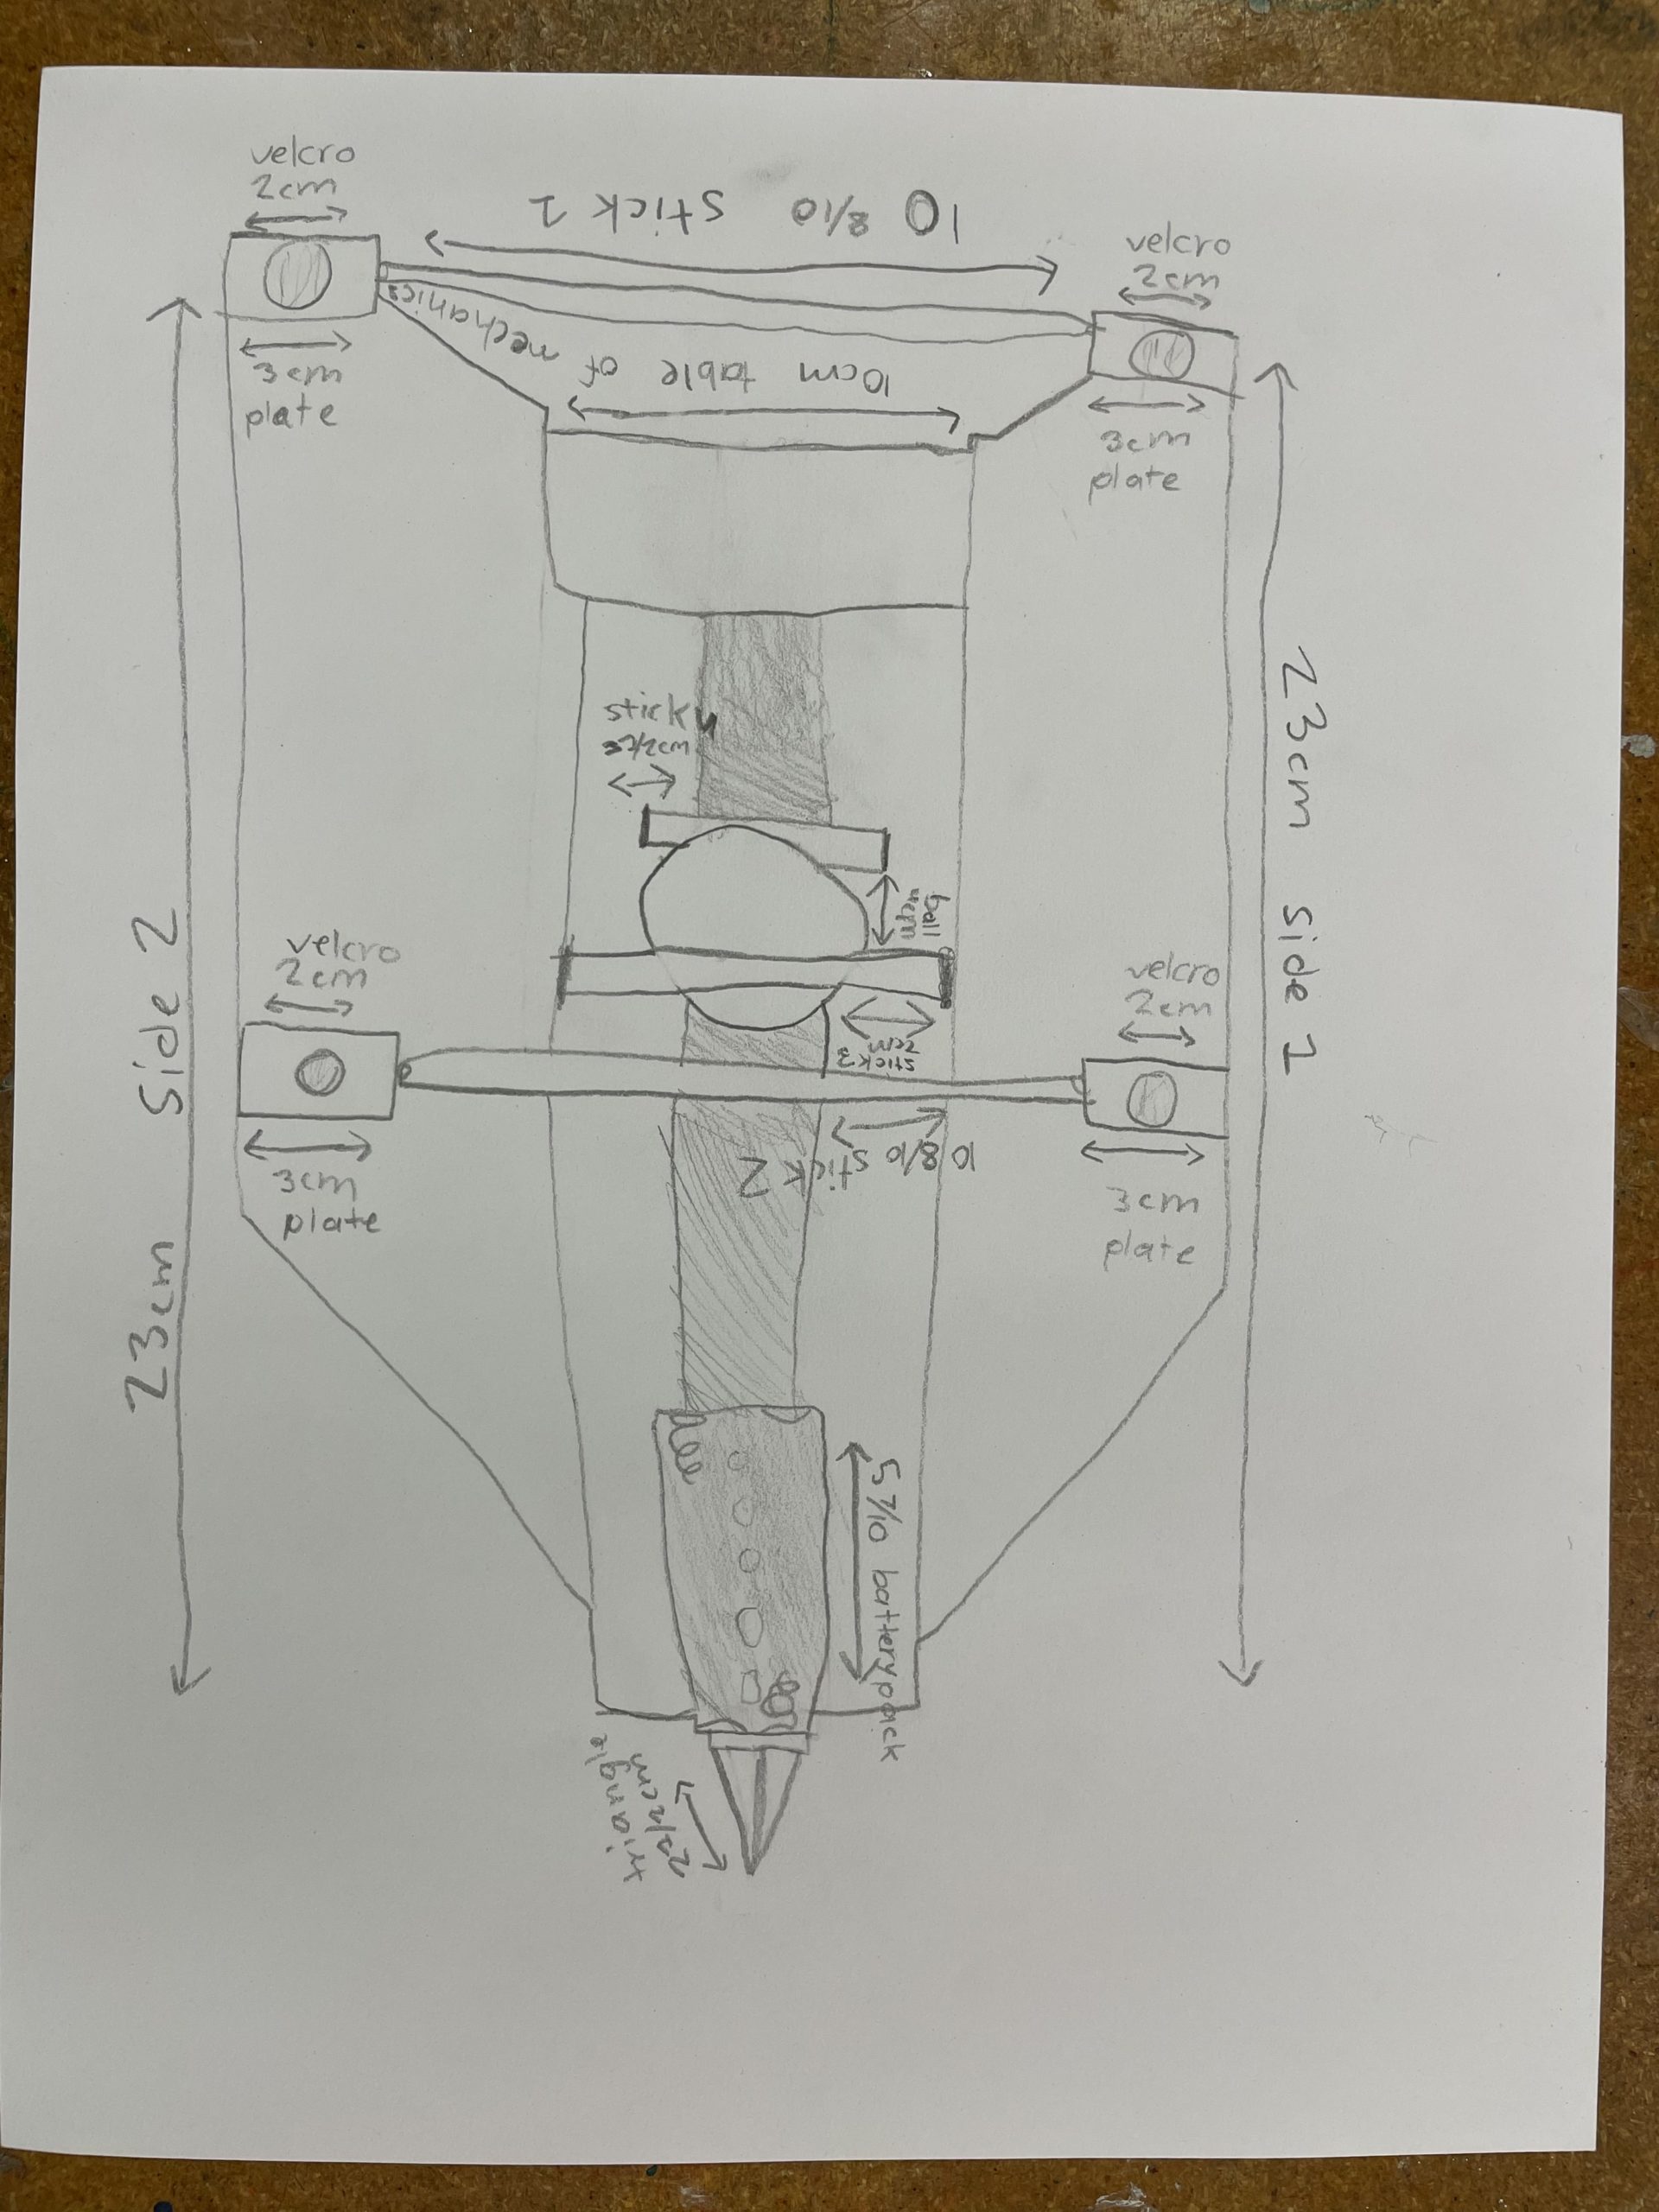
Design Drawing: Top View
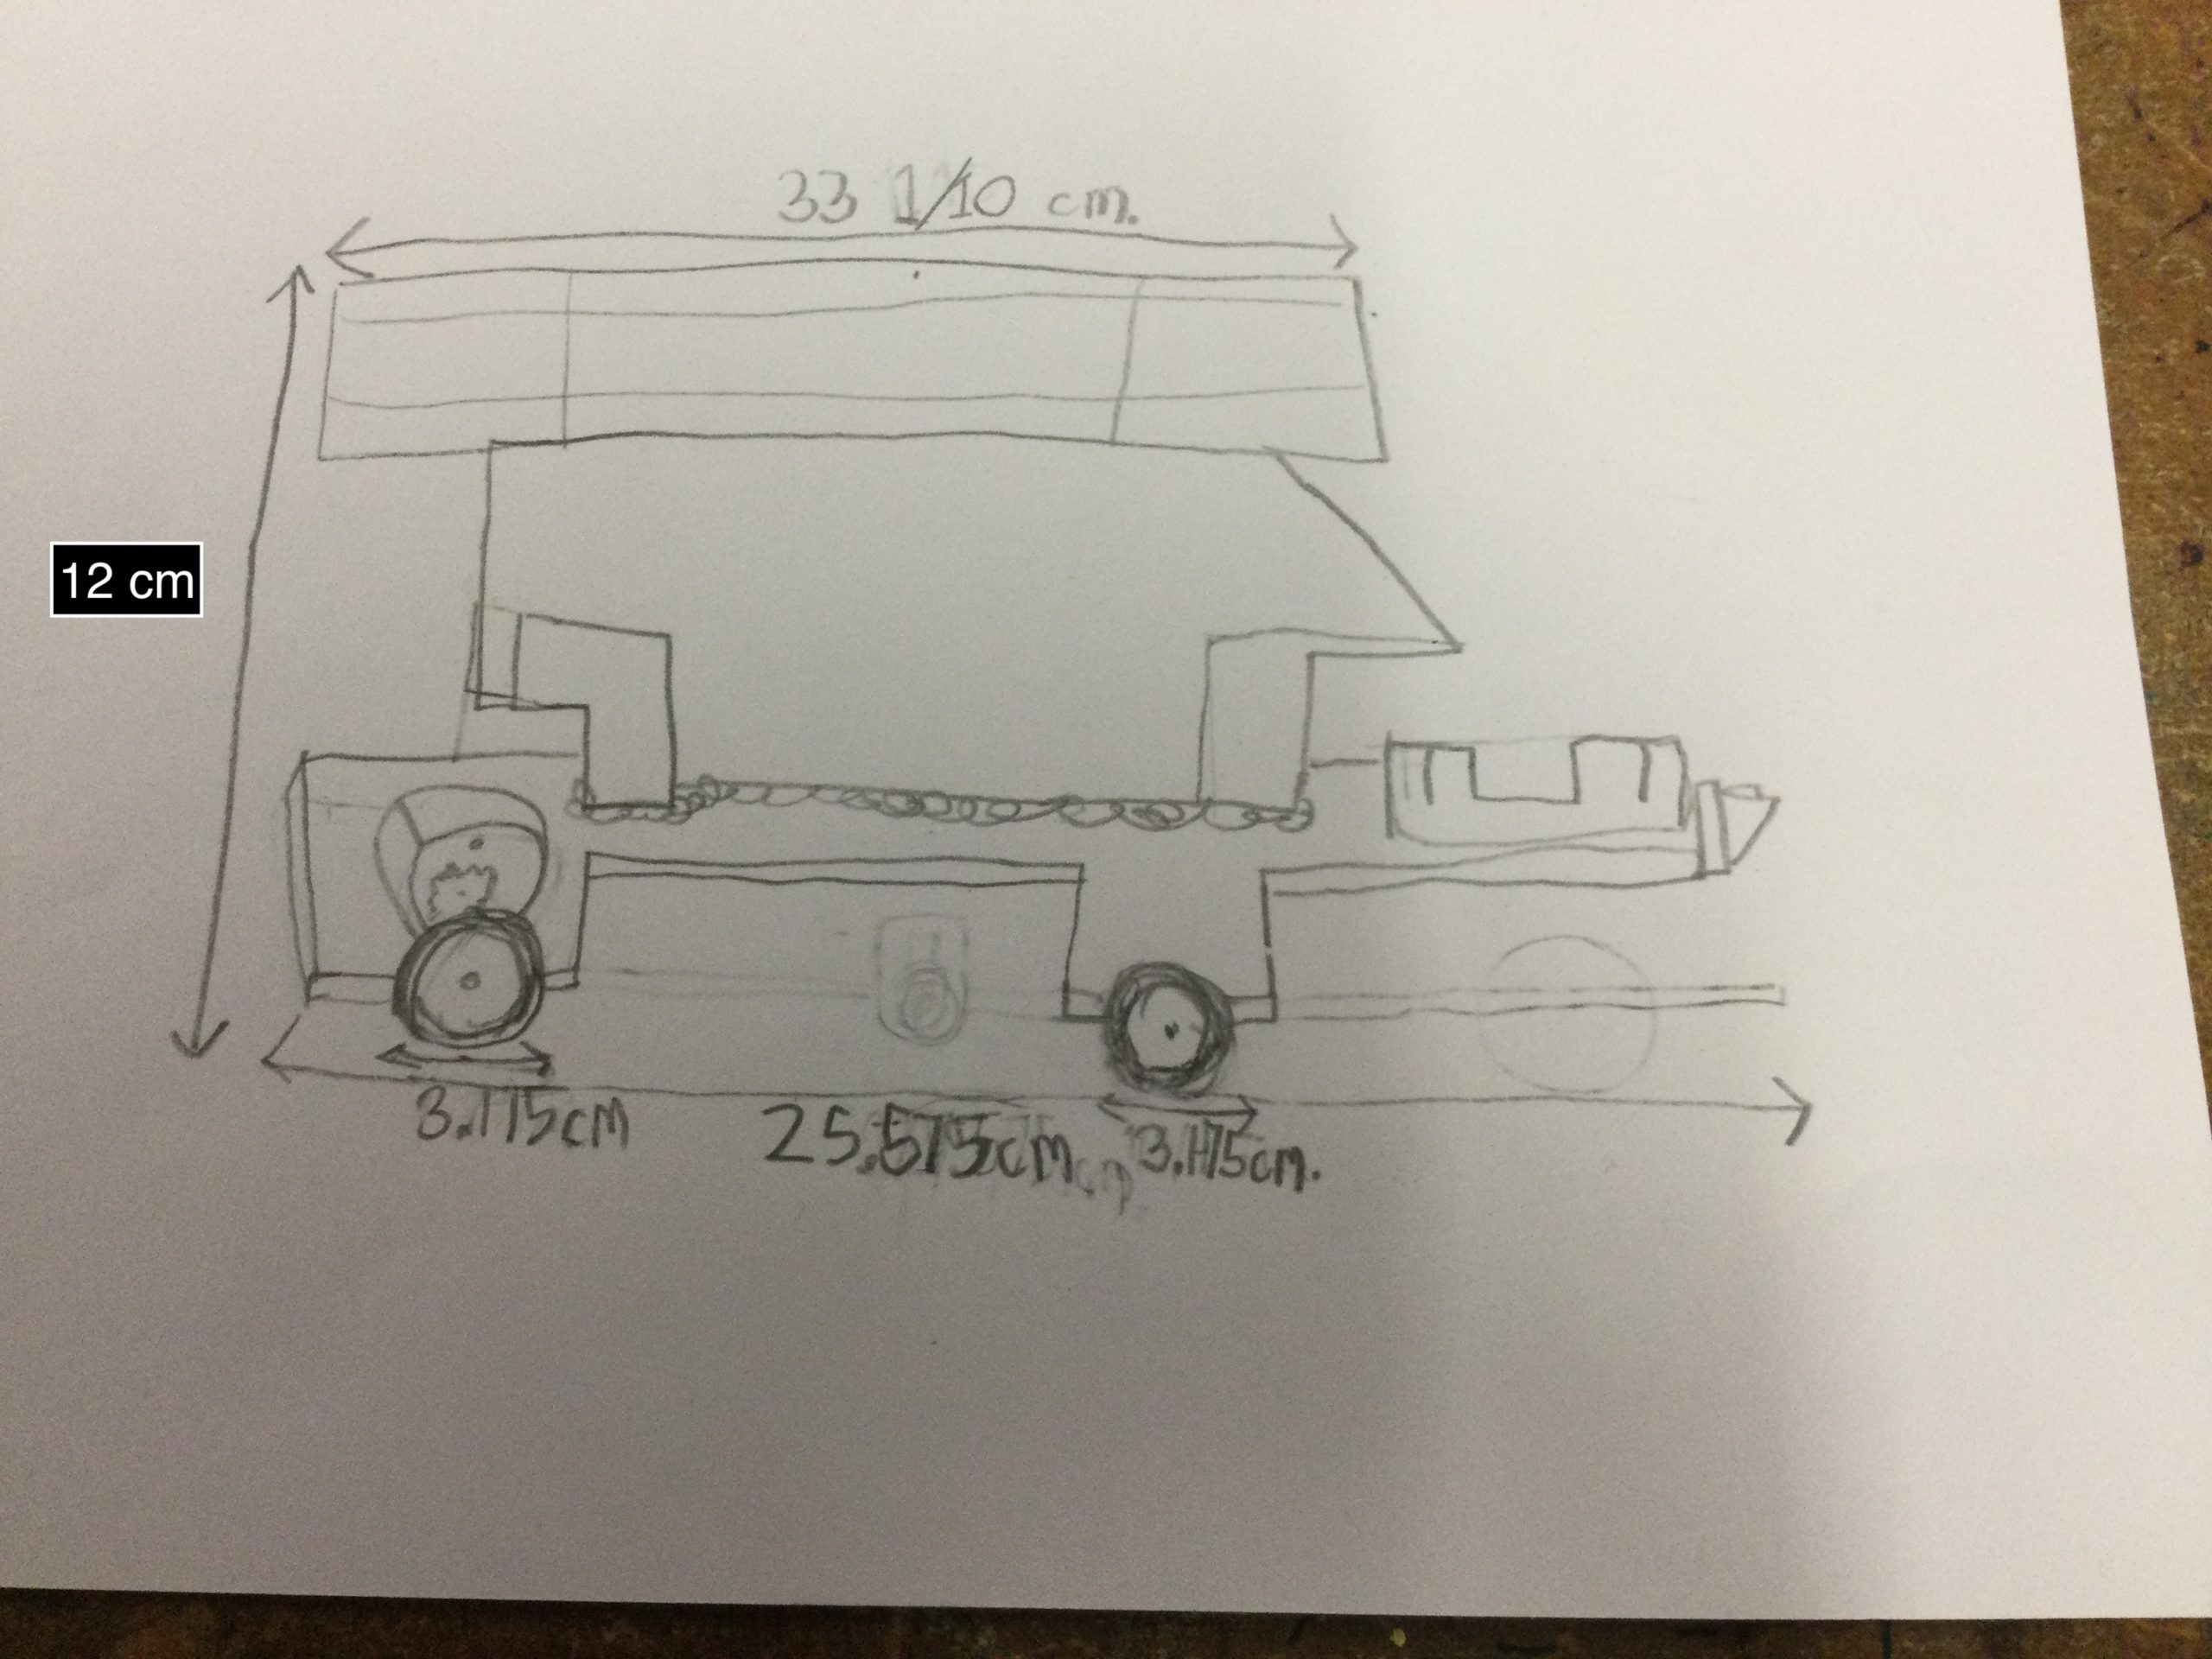
Design Drawing: Side View
Final Car Specifications
| Car Size with Panel | Length: 39.0cm | Width: 12.1cm | Height: 12.2 cm |
| Weight with Panel | 105 g | ||
| Wheel Size | Front wheels: 3.7cm | Back Wheels: 3.7cm | |
| Gear Ration | motor gear: axel gear 18:60 = 3:10 |
Materials Used
| Item | Approx. Cost |
| New: | |
| Solar Made Solar Panel (3V) | 38.25 |
| small white gears, wheels and axels | 3.99 |
| Solar Made Motor (3V) | 5.25 |
| balsa wood | 3.99 |
| spacers for bearings (4) | 2.31 |
| batter pack without switch | 0.26 |
| switch | 3.85 |
| piece of black binder comb to hold guide wire | 0.07 |
| dowel pieces | 1.25 |
| alligator clips (5) | 0.70 |
| Consumables: | |
| masking and duct tape | |
| solder | |
| Velcro | |
| hot glue | |
| Total Cost: 59.92 |
Test Results / Trial Runs
Test Runs 1 – date: 3/09/24
Weather conditions: Sunny, some clouds
Ran on panel or battery? both
Observations of results: straight
Any recommendations for improvements:
| Attempt | Time, S (seconds) | Distance, M (meters) | Speed, M/S |
| 1 | 9.78 seconds (with battery) | 20 m | 2.04 m/s |
| 2 | 12.80 seconds (with panel) | 20 m | 1.56 m/s |
| 3 |
Test Runs 2 – date: 3/11/24
Weather conditions: Ran in hall (no sun)
Ran on panel or battery? battery
Observations of results: straight
Any recommendations for improvements:
| Attempt | Time, S (seconds) | Distance, M (meters) | Speed, M/S |
| 1 | 6.89 s | 16.5 m | 2.39 m/s |
| 2 | 7.69 s | 16.5 m | 2.14 m/s |
| 3 | 7.12 s | 16.5 m | 2.31 m/s |
Test Runs 3 – date: 3/16/24
Weather conditions: Great sunny day
Ran on panel or battery? panel
Observations of results: straight
Any recommendations for improvements:
| Attempt | Time, S (seconds) | Distance, M (meters) | Speed, M/S |
| 1 | 9.03 s | 20 m | 2.21 m/s |
| 2 | 9.40 s | 20 m | 2.12 m/s |
| 3 | 9.62 s | 20 m | 2.07 m/s |
Test Runs 4 – date: 3/16/24
Weather conditions: Great sunny day
Ran on panel or battery? Battery
Observations of results: Our car went straight
Any recommendations for improvements: Our car is going straight but we have to find a way to improve our speed.
| Attempt | Time, S (seconds) | Distance, M (meters) | Speed, M/S |
| 1 | 10.72 s | 20 m | 1.86 m/s |
| 2 | 12.57 s | 20 m | 1.59 m/s |
| 3 |
Test Runs 1 – date: 3/17/24
Weather conditions: Great sun
Ran on panel or battery? panel
Observations of results: Our car went straight!
Any recommendations for improvements:
| Attempt | Time, S (seconds) | Distance, M (meters) | Speed, M/S |
| 1 | 8.93 | 20 m | 2.23 m/s |
| 2 | |||
| 3 |
Video of Our Car Running
Vehicle Features Video
Additional Information
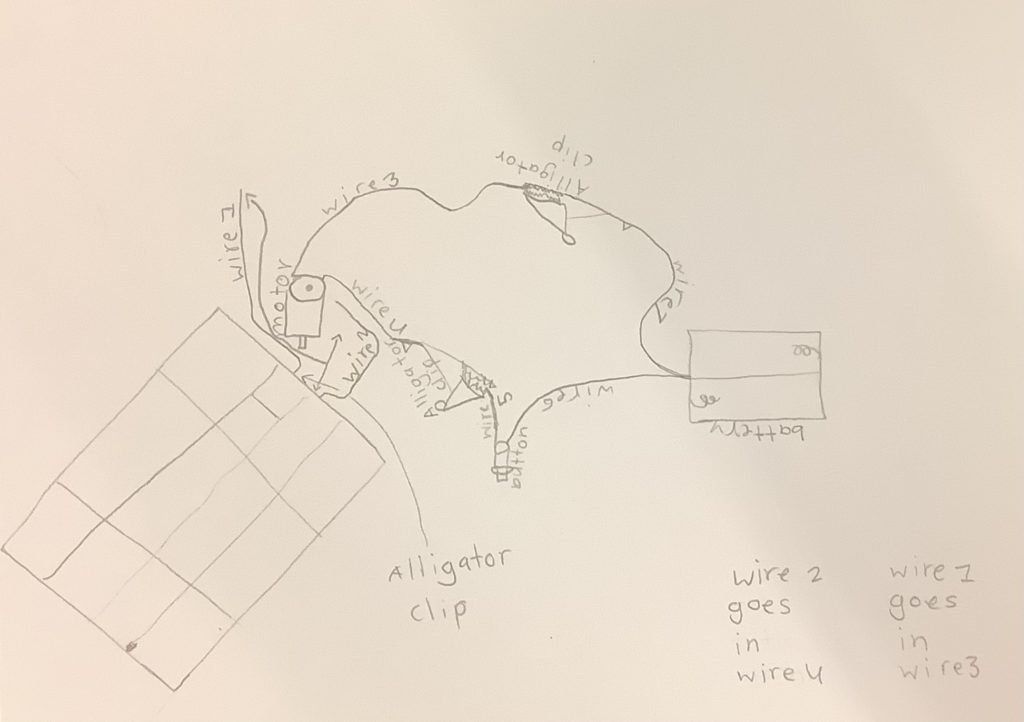
This is a picture of our two electrical circuits. It is the same DC motor in both circuits.
Unique way to build holding the ball right into the basic design, instead of it looking like a last second addition. I like it!