
The Solar Girls –
Event Location: Orange County STEM Saturday
Competition: Junior Solar Sprint
Division: 4-6 (JSS Green)
School: Bay Meadows Elementary
Team Name: The Solar Girls
Project Name: Junior Solar Sprint
Team Size: 4
Bay Meadows Junior Solar Sprint
Hello everyone!
Hello everyone! Our names are Aria L, Sophia S, Khushi K and Mirha R. We all go to Bay Meadows Elementary school. For our project, we chose to do the Junior Solar Sprint. It’s also called (in a easier way) a solar powered car.
Materials used:
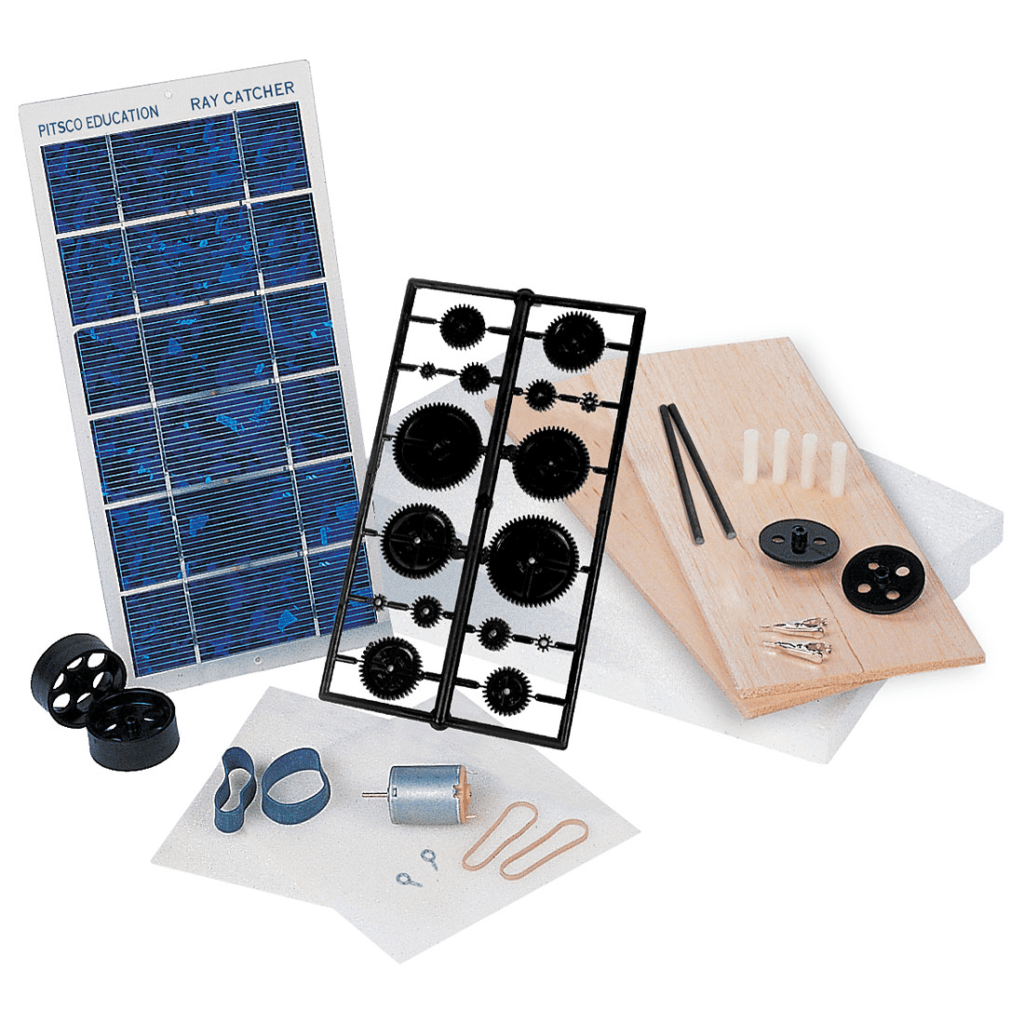
- Ray catcher
- 2 balsa wood sheets
- 2 alligator clips
- 2 pitsco GT-F wheels
- 2 pitsco GT-R wheels
- 2 screw eyes
- Junior solar sprint rules and regulations
- no. 280 Motor
- 4 nylon spacers
- 2 steel axels
- plastic gear font
- 2 No. 14 rubber bands
- Ray catcher sprint deluxe kit instructions
- Cool-melt glue gun
- Soldering iron
- Sharp utility knife
- Needlenose pliers
- 2 C-clamps
- Ruler
- Coping saw (Optional)
What is a solar powered car?
When the sun shines onto a solar panel, energy from the sunlight is absorbed by the PV cells in the panel. This energy creates electrical charges that move in response to an internal electrical field in the cell, causing electricity to flow. It’s a kind of electrical charge that causes the wires to spark up and take action causing the car (or a different thing) to move.
Design

(Without solar panel)
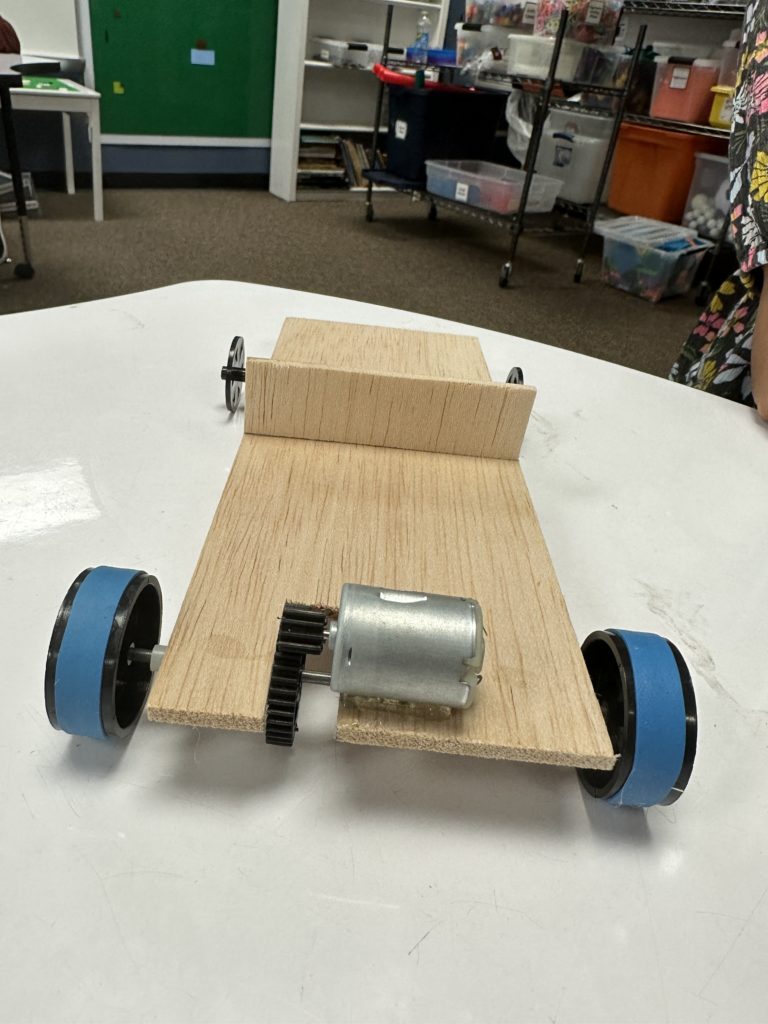
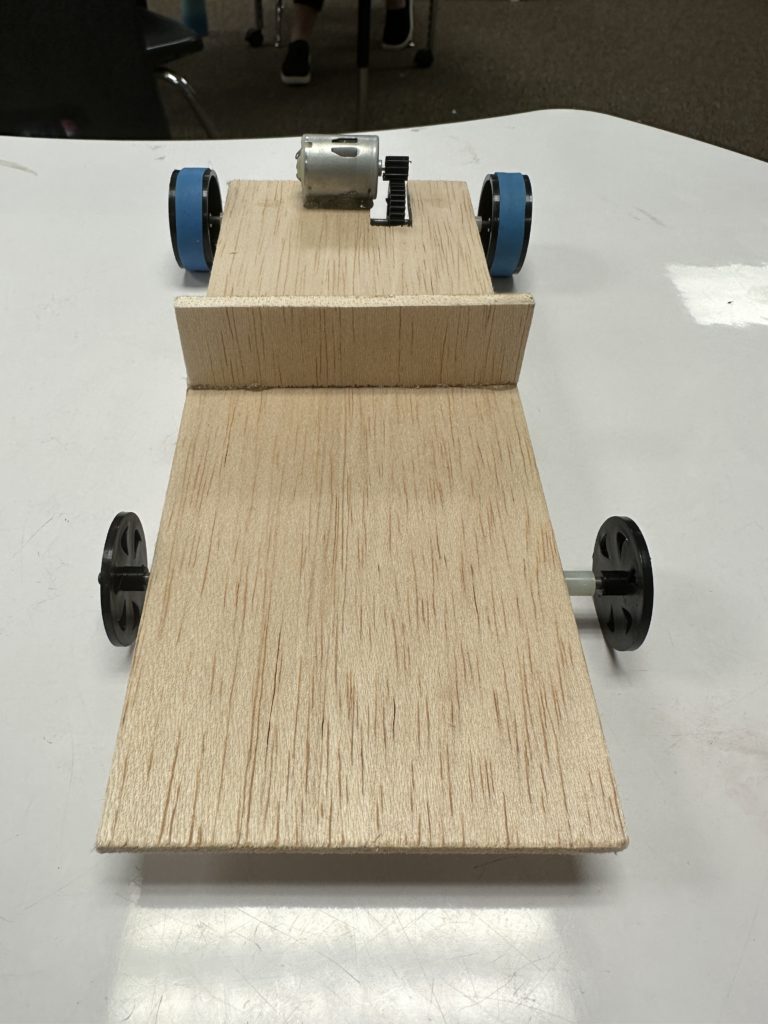
step 1 – First, we started by creating a notch for the wheel and the motor.
step 2 – Then we cut the wood. (we cut the at the edge of the wood to place a gear in between the hole that you can see in pictures 1,2, and 3.
step 3 – After that, we took another piece of balsa wood and cut a thin rectangle and glued it at the middle of the car as shown in pictures on 1,2 and 3.
step 4 – After step 3, we connected a gear to the back set of tires and made the gear positioned in the hole we cut in step 2.( you can see the gear positioned in pictures 1 and 2).
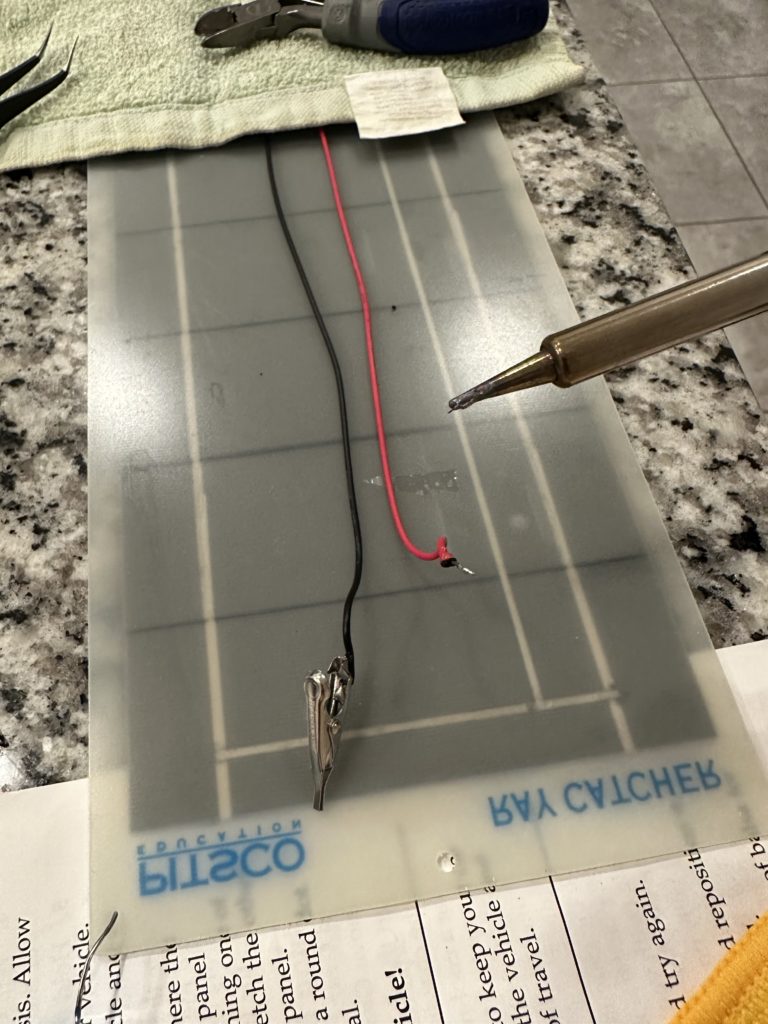
Step 5 – Next we soldered the two leads to two alligator clips. (as shown in picture 4).
step 6 – Then we aligned the silver motor to the gears which would make the motor run. (you can see a close look in pic 1)
step 7- Then we connected the alligator clips to the lead (or the wires) of the solar panel
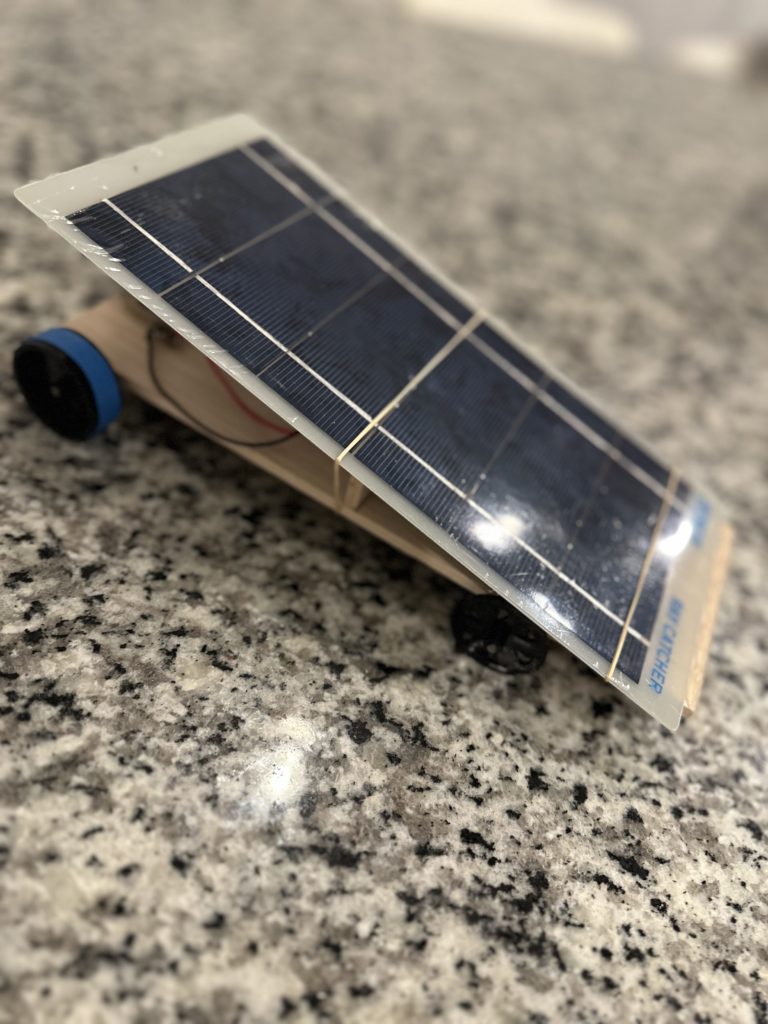
step 8 – Then we positioned the solar panel on the chassis(to provide ledge) so it rested on the front of the vehicle and secured it with a line of extra glue at the front (as shown in picture 5
step 9 – Finally we connected the red lead alligator clip to the motor terminal which has a round dot and did the same for the black lead.
step 10 – Last but not least, we secured the alligator clips into the motor so that it worked. Then you’re done!